Feb 092016
 

Over the years I’ve developed a lot of tricks and techniques for building systems with plugins, remote peers, and multiple components. Recently while working on a new project I decided to pull all of those tricks together into a single package. What came out is “channels” which is both a protocol description and a design pattern. Implementing “channels” leads to systems that are robust, easy to develop, debug, test, and maintain.

The channels protocol borrows from XML syntax to provide a means for processes to communicate structured data in multiplexed channels over a single bi-directional connection. This is particularly useful when the processes are engaged in multiple simultaneous transactions. It has the added benefit of simplifying logging, debugging, and development because segments of the data exchanged between processes can be easily packaged into XML documents where they can be transformed with XSLT, stored in databases, and otherwise parsed and analyzed easily.

With a little bit of care it’s not hard to design inter-process dialects that are also easily understood by people (not just machines), readily searched and parsed by ordinary text tools like grep, and easy to interact with using ordinary command line tools and terminal programs.

Some Definitions…

    Peer: A process running on one end of a connection.

    Connection: A bi-directional stream. Usually a pipe to a child process or TCP connection.

    Line: The basic unit of communication for channels. A line of utf-8 text ending in a new-line character.

    Message: One or more lines of text encapsulated in a recognized XML tag.

    Channel Marker: A unique ch attribute shared among messages in a channel.

    Channel: One or more messages associated with a particular channel marker.

    Chatter: Text that is outside of a channel or message.

How to “do” channels…

First, open a bi-directional stream. That can be a pipe, or a TCP socket or some other similar mechanism. All data will be sent in utf-8. The basic unit of communication will be a line of utf-8 text terminated with a new-line character.

Since the channels protocol borrows from XML we will also use XML encoding to keep things sane. This means that some characters with special meanings, such as angle brackets, must be encoded when they are to be interpreted as that character.

Each peer can open a channel by sending a complete XML tag with an optional channel marker (@ch) and some content. The tag acts as the root element of all messages on a given channel. The name of the tag specifies the “dialect” which describes the language that will be used in the channel.

The unique channel marker describes the channel itself so that all of the messages associated with the channel can be considered part of a single conversation.

Channels cannot change their dialect, channel markers must be unique within a a connection, and channel markers cannot be reused. This allows each channel marker to act as a handle that uniquely identifies any given channel.

A good design will take advantage of the uniqueness of channel markers to simplify debugging and improve the functionality of log files. For example, it might be useful in some applications to use structured channel markers that convey some additional meaning and to make the markers unique across multiple systems and longer periods of time. It is usuall a good idea to include a serialized component so that logged channels can be easily sorted. Another tip would be to include something that is unique about a particular peer so that channels that are initiated at one end of the pipe can be easily distinguished from those initiated at the other end. (such as a master-slave relationship). All of that said, it is perfectly acceptable to use simple serialized channel markers where appropriate.

Messages are always sent atomically. This allows multiple channels to be open simultaneously.

An example of opening a channel might look like this:

<dialect ch='0'>This message is opening this channel.</dialect>

Typically each channel will represent a single “conversation” concerning a single transaction or interaction. The conversation is composed of one or more messages. Each message is composed of one or more lines of text and is bound by opening and closing tags with the same dialect.

<dialect ch='0'>This is another message in the same channel.</dialect>

<dialect ch='0'>
    As long as the ch is the same, each message is part of one
    conversation. This allows multiple conversations to take place over
    a single connection simultaneously - even in different dialects.
    Multi-line messages are also ok. The last line ends with the
    appropriate end tag.
</dialect>

By the way, indenting is not required… It’s just there to make things easier to read. Good design include a little extra effort to make things human friendly 😉

<dialect ch='0'>
    Either peer can send a message within a channel and at the end, either
    peer can close the channel by sending a closed tag. Unlike XML,
    closed tags have a different meaning than empty elements. In the
    channels protocol a closed tag represents a NULL while an empty
    element represents an empty message.

    The next message is simply empty.
</dialect>

<dialect ch='0'></dialect>

<dialect ch='0'>
    The empty message has no particular meaning but might be used
    to keep a channel open whenever a timeout is being used to verify that
    the channel is still working properly.

    When everything has been said about a particular interaction, such as
    when a transaction is completed, then either peer can close the
    channel. Normally the peer to close the channel is the one that must
    be satisfied before the conversation is over.

    I'll do that next.
</dialect>

<dialect ch='0'/> The channel '0' is now closed.

Note that additional text after a closing tag is considered to be chatter and will often be ignored. However since it is part of a line that is part of the preceding message it will generally be logged with that message. This makes this kind of text useful for comments like the one above. Remember: the basic unit of communication in the channels protocol is a line of utf-8 text. The extra chatter gets included with the channel close directive because it’s on the same line.

Any new message must be started on a different line because the opening tag of any message must be the first non-whitespace on a line. That ensures that messages and related chatter are never mixed together at the line level.

Chatter:

Lines that are not encapsulated in XML tags or are not recognized as part of a known dialect are called chatter.

Chatter can be used for connection setup, keep-alive messages, readability, connection maintenance, or as diagnostic information. For example, a child process that uses the channels protocol might send some chatter when it starts up in order to show it’s version information and otherwise identify itself.

Allowing chatter in the protocol also provides a graceful failure mechanism when one peer doesn’t understand the messages from the other. This happens sometimes when the peers are using different software versions. Logging all chatter makes it easier to debug these kinds of problems.

Chatter can also be useful for facilitating debugging functions out-of-band making software development easier because the developer can exercise a peer using a terminal or command line interface. Good design practice for systems that implement the channels protocol is for the applications to use human-friendly syntax in the design of their dialects and to provide useful chatter especially when operating in a debug mode. That said, chatter is not required, but systems implementing the channels protocol must accept chatter gracefully.

Layers:

A bit of a summary: The channels protocol is built up in layers. The first layer is a bi-directional connection. On top of that is chatter in the form of utf-8 lines of text and the use of XML encoding to escape some special characters.

  • Layer 0: A bi-directional stream / connection between two peers.
  • Layer 1: Lines of utf-8 text ending in a new-line character.
    • Lines that are not recognized are chatter.
    • Lines that are tagged and recognized are messages.
  • Layer 2: There are two kinds of chatter:
    • Noise. Unrecognized chatter should be logged.
    • Diagnostics. Chatter recognized for low-level functions and testing.
  • Layer 3: There are two kinds of messages:
    • Shouts. A single message without a channel marker.
    • Channels. One or more messages sharing a unique channel marker.

In addition to those low-level layers, each channel can contain other channels if this kind of multiplexing is supported by the dialect. The channels protocol can be applied recursively providing sub-channels within sub-channels.

  • Layer …
  • Layer n: The channels protocol is recursive. It is perfectly acceptable to implement another channels layer inside of a channel – or shouts within shouts. However, the peers need to understand the layering by treating the contents of a channel (or shout) as the connection for the next channels layer.

Consider a system where the peers have multiple sub-systems each serving serving multiple requests for other clients. Each sub-system might have it’s own dialect serving multiple simultaneous transactions. In addition there might be a separate dialect for management messages.

Now consider middle-ware that combines clusters of these systems and multiplexes them together to perform distributed processing, load balancing, or distributed query services. Each channel and sub-channel might be mapped transparently to appropriate layers over persistent connections within the cluster.


Channels protocol synopsis:

Uses a bi-directional stream like a pipe or TCP connection.

The basic unit of communication is a line of utf-8 text ending in a new-line.

Leading whitespace is ignored but preserved.

A group of lines bound by a recognized XML-style tag is a message.

When beginning a message the opening tag should be the first non-whitespace characters on the line.

When ending a message the ending tag should be the last non-whitespace characters on the line.

The name of the opening tag defines the dialect of the message. The dialect establishes how the message should be parsed – usually because it constrains the child elements that are allowed. Put another way, the dialect usually describes the root tag for a given XML schema and that specifies all of the acceptable subordinate tags.

The simplest kind of message is a shout. A shout always contains only a single message and has no channel marker. Shouts are best used for simple one-way messages such as status updates, simple commands, or log entries.

Shout Examples:

<dialect>This is a one line shout.</dialect>

<shout>This shout uses a different dialect.</shout>

<longer-shout>
    This is a multi-line shout.
    The indenting is only here to make things easier to read. Any valid
    utf-8 characters can go in a message as long as the message is well-
    formed XML and the characters are properly escaped.
</longer-shout>

For conversations that require responses we use channels.

Channels consist of one or more messages that share a unique channel marker.

The first message with a given channel marker “opens” the channel.

Any peer can open a channel at any time.

The peer that opens a channel is said to be the initiator and the other peer is said to be the responder. This distinction is not enforced in any way but is tracked because it is important for establishing the role of each peer.

A conversation is said to occur in the order of the messages and typically follows a request-response format where the initiator of a channel will send some request and the responder will send a corresponding response. This will generally continue until the conversation is ended.

Example messages in a channel:

<dialect ch='0'>
    This is the start of a message.
    This line is also part of the message.
    The indenting makes things easier to read but isn't necessary.

    <another-tag> The message can contain additional XML
        but it doesn't have to. It could contain any string of
        valid utf-8 characters. If the message does contain XML
        then it should be well formed so that software implementing
        channels doesn't make errors parsing the stream.</another-tag>

</dialect>

<dialect ch='0'>This is a second message in the same channel.</dialect>
<dialect ch='0'>Messages flow in both directions with the same ch.</dialect>

Any peer can close an open channel at any time.

To close a channel simply send a NULL message. This is different from an empty message. An empty message looks like this and DOES NOT close a channel:

<dialect ch='0'></dialect>

Empty messages contain no content, but they are not NULL messages. A NULL message uses a closed tag and looks like this:

<dialect ch='0'/>

Note that generally, NULL (closed) elements are used as directives (verbs) or acknowledgements. In the case of a NULL channel element the directive is to close the channel and since the channel is considered closed after that no acknowledgement is expected.

Multiple channels in multiple dialects can be open simultaneously.

In all cases, but especially when multiple channels are open, messages are sent as complete units. This allows messages from multiple channels to be transmitted safely over a single connection.

Any line outside of a message is called chatter. Chatter is typically logged or ignored but may also be useful for diagnostic purposes, human friendliness, or for low level functions like connection setup etc.


A simple fictional example that makes sense…

A master application ===> connects to a child service.

---> (connection and startup of the slave process)
<--- Child service 1.3.0
<--- Started ok, 20160210090103. Hi!
<--- Debug messages turned on, so log them!
---> <service ch='0'><tell-me-something-good/></service>
<--- <service ch='0'><something-good>Ice cream</something-good></service>
---> <service ch='0'><thanks/></service>
---> <service ch='0'/>
---> <service ch='1'><tell-me-something-else/></service>
<--- <service ch='1'><i>I shot the sheriff</i></service>
<--- <service ch='1'><i>but I did not shoot the deputy.</i></service>
<--- I'm working on my ch='1' right now.
<--- Just thought you should know so you can log my status.
<--- Still waiting for the master to be happy with that last one.
---> <service ch='1'><thanks/></service>
---> <service ch='1'/>
<--- Whew! ch='1' was a lot of work. Glad it's over now.
...
---> <service ch='382949'><shutdown/></service>
<--- I've been told to shut down!
<--- Logs written!
<--- Memory released!
<--- <service ch='382949'><shutdown-ok/></service>
<--- <service ch='382949'/> Not gonna talk to you no more ;-) Bye!
Jan 212015
 

During an emergency, communication and coordination become both more vital and more difficult. In addition to the chaos of the event itself, many of the communication mechanisms that we normally depend on are likely to be degraded or unavailable.

The breakdown of critical infrastructure during an emergency has the potential to create large numbers of isolated groups. This fragmentation requires a bottom-up approach to coordination rather than the top-down approach typical of most current emergency management planning. Instead of developing and disseminating a common operational picture through a central control point, operational awareness must instead emerge through the collaboration of the various groups that reside beyond the reach of working infrastructure. This is the “last klick” problem.

For a while now my friends and I have been discussing these issues and brainstorming solutions. What we’ve come up with is the MCR (Modular Communications Relay). A communications and coordination toolkit that keeps itself up to date and ready to bridge the gaps that exist in that last klick.

Using an open-source model and readily available components we’re pretty sure we can build a package that solves a lot of critical problems in an affordable, sustainable way. We’re currently seeking funding to push the project forward more quickly. In the mean time we’ll be prototyping bits and pieces in the lab, war-gaming use cases, and testing concepts.

Here is a white-paper on MCR and the “last klick” problem: TheLastKlick.pdf

Sep 122014
 

What if you could describe any kind of digital modulation scheme with high fidelity using just a handful of symbols?

Origin:

While considering remote operations on HF using CW I became intuitively aware of two problems: 1. Most digital modes done these days require a lot of bandwidth because the signals are being transmitted and received as digitized audio (or worse), and 2. Network delays introduce timing problems inherent in CW work that are not normally apparent in half-duplex digital and audio work.

I’m not only a ham and an engineer, I’m also a musician and a CW enthusiast… so it doesn’t sit well with me that if I were to operate CW remotely I would have few options available to control the timing and presentation of my CW transmissions. A lot more than just letters can be communicated through a straight key – or even paddles if you try hard enough. Those nuances are important!

While considering this I thought that instead of sending audio to the transmitter as with other digital modes I might simply send timing information for the make and break actions of my key. Then it occurred to me that I don’t need to stop there… If I were going to do that then in theory I could send high fidelity modulation information to the transmitter and have it generate the desired signals via direct synthesis. In fact, I should be able to do that for every currently known modulation scheme and then later use the same mechanism for schemes that have not yet been invented.

The basic idea:

I started scratching a few things down in my mind and came up with the idea that:

  • I can define a set of frequencies to use for any given modulation scheme and then identify them symbolically.
  • I can define a set of phase relationships and assign them symbolic values.
  • I can define a set of amplitude relationships and assign them symbolic values.
  • I can define the timing and rate of transition between any of the above definitions.

If I were to send a handful of bytes with the above meanings then I could specify whatever I want to send with very high fidelity and very low bandwidth. There are only so many things you can do to an electrical signal and that’s all of them: Frequency, Amplitude, Phase, … the rate of change between those, and the timing of those changes.

Consider:

T — transition timing in milliseconds. 0-255.
A — amplitude in % of max voltage 0-255.
F — frequency (previously defined during setup) 0 – 255 possible frequencies.
P — phase (previously defined during setup) 0 – 255 possible phase shifts.

To send the letter S in CW then I might send the following byte pairs. The first byte contains an ascii letter and the second byte contains a numerical value from 0 – 255:

T10 A255 T245 T10 A0 T245 T10 A255 T245 T10 A0 T245 T10 A255 T245 T10 A0 T0

That string essentially means:

// First dit.
// Turn on for about a quarter of a second.

T10 – Transition to the following settings using 10 milliseconds.
A255 – Amplitude becomes 255 (100%).
T245 – Stay like that for 245 milliseconds.

// … then turn off for about a quarter of a second.

T10 – Transition to the following using 10 milliseconds.
A0 – Amplitude becomes 0.
T245 – Stay like that for 245 milliseconds.

// Do that two more times.

// Turn off.

T10 – Transition using 10 ms.
A0 – Amplitude becomes 0.
T0 – Keep this state until further notice.

36 Bytes total.

So, a handful of bytes can be used to describe the amplitude modulation envelope of a CW letter S using a 50% duty cycle for dits and having a 10ms rise and fall time to avoid “clicks”. This is a tiny fraction of the data that might be required to send the same signal using digitized audio… and if you think about it the same technique could be used to send all other digital modes also.

There’s nothing to say that we have to use that coding scheme specifically. I just chose that scheme for illustration purposes. The resolution could be more or less than 0-255 or even a different ranges for each parameter. In practice it is likely that the data might be sent in a wide range of formats:

We could use a purely binary mode with byte positions indicating specific data values… (TransitionTime, Amplitude, Frequency, Phase) so that each word defines a transition. That opens up the use of some nonsensical values for special meanings — for example the phase and frequency values have no meaning at zero amplitude so many words with zero amplitude could be used as control signals. Of course that’s not very user friendly so…

We could use a purely text based mode using ascii… The same notation used above would provide a user friendly way of sending (and debugging) DMDL. I think that’s probably my favorite version right now.

Why not just send the bytes and let the transmitter take care of the rest?

If I were to use a straight key for my input device this mechanism allows me to efficiently transmit a stream of data that accurately defines my operation of that key… so those small musical delays, rhythms, and quirks that I might want to use to convey “more than just the letters” would be possible.

At the transmitter these codes can be translated directly into the RF signal I intended to send with perfect fidelity via direct synthesis. I simply tell the synthesizer what to do and how to make those transitions. I know that beast doesn’t quite exist yet, but I can foresee that the code and hardware to create it would not be terribly hard to develop using a wave table, some simple math, and a handful of timing tricks.

Even more fun: If I want to try out a new modulation scheme for digital communications then I can get to ground quickly by simply defining the specifications of what I want that modulation to look like and then converting those specs into DMDL code. With a little extra imagination I can even define DMDL code that uses multiple frequencies simultaneously!

If you really want to go down the rabbit hole, what about demodulating the same way?

Now you’re thinking like a Madscientist. A cognitive demodulator based on DMDL could make predictions based on what it thinks it hears. Given sufficient computing power, several of those predictions can be compared with the incoming signal to determine the best fit… something like a chess program tracing down the results of the most likely moves.

The cognitive demodulator would output a sequence of transitions in DMDL and then some other logic that understands the protocol could convert that back into the original binary data.

Even kewler than that, the “converter” could also be cognitive. Given a stream of transitions and the data it expects to see it could send strings of DMDL back to the demodulator that indicate the most likely interpretations of the data stream and a confidence for each option.

If there is enough space and processing power, the cognitive demodulator when faced with a low confidence signal from the converter might respond by replaying the previous n seconds of signal using different assumptions to see if it can get a better score.

Then, if that weren’t enough, an unguided learning system could monitor all of these parameters to optimize for the assumptions that are most likely to produce a high confidence conversion and a high correlation with the incoming signals. Over time the system would learn “how to listen” in various band conditions.

Jan 032010
 

We’re doing a lot of cross-platform software development these days, and that means doing a lot of cross-platform testing too.

The best way to handle that these days is with virtual computing since it allows you to use one box to run dozens of platforms (operating system and software configurations) at once – even simultaneously if you wish (and we do).

Until recently we were outsourcing this part of our operation but that turned out to be very painful. To date nobody in the cloud-computing game quite has the interface we need for making this work. In particular we need the ability to keep pristine images of platforms that we can load on demand. We also need the ability to create new reusable snapshots as needed.

All of this exists very nicely in VMWare, of course, but to access it you really need to have your own VMWare setup in-house (at least that’s true at the moment). So I ordered a new Dell Power Edge 2970 to run at the Mad Lab with ESXi 4.

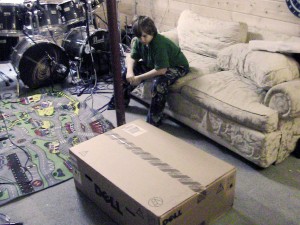
Hey Leo - Install that for me

Hey Leo - Install that for me

Around the Mad Lab we like to take every opportunity to teach, learn, and experiment so I enlisted Leo to get the server installed.

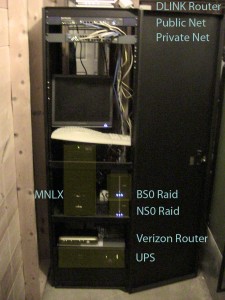
The first thing that occurred to me after it arrived is that it’s big and heavy. We have a rack in the lab from our old data center in Sterling, but it’s one of the lighter-duty units so some “adaptation” would be required. Hopefully not too much.

Mad Rack before the new server

Mad Rack before the new server

Another concern that I had is that this server might be too loud. After all, boxes like this are used to living in loud concrete and steel buildings where people do not go. I need to run this box right next to the main tracking room in the recording studio. No matter though – it must be done, and I’ve gotten pretty good at treating noisy equipment so that it doesn’t cause problems. In fact, the rack lives in a special utility room next to the air handler so everything I do in there to isolate that room acoustically will help with this too.

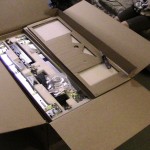
Opening the box we quickly discovered I was right about the size. The rail kit that came with the device was clearly too large for the rack. We would have to find a different solution.

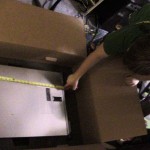
The server itself would stick out the back of the rack a bit so I had Leo measure it’s depth and check that against the depth we had available in the rack.

As it turned out we needed to move the rack forward a bit in order to leave enough space behind it. The rack is currently installed in front of a structural column and some framing. Once Leo measured the available distance we moved the rack forward about 8 inches. That provided plenty of space for the new server and access to it’s wiring.

Gosh those rails look big

Gosh those rails look big

How long is it?

How long is it?

Must move the rack to make room

Must move the rack to make room

That solved one problem but we still had the issue of the rails being too long for the rack. Normally I might take a hack saw to them and modify them to fit but in this case that would not be possible – and besides: the rail kit from Dell is great and we might use it later if we ever move this server out of the Mad Lab and into one of the data centers.

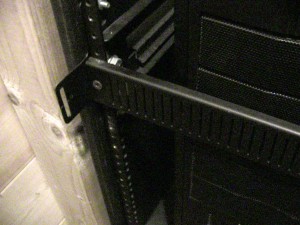
Luckily I’d solved this problem before and it turned out we had the parts to do it this time as well. Each of these slim-line racks has a number of cross members installed for ventilation and stability. These are pretty tough pieces of kit though so they can be used in a pinch to act as supports for the front and back of a long server like this. Just our luck we had two installed – they just needed to be moved a bit.

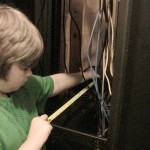
I explained to Leo how the holes are drilled in a rack, the concept of “units” (1-U, 2-U, etc), and where I wanted the new server to live. Leo measured the height and Ian counted holes to find the new locations for the front and back braces.

Use these braces instead of rails

Use these braces instead of rails

Teamwork

Teamwork

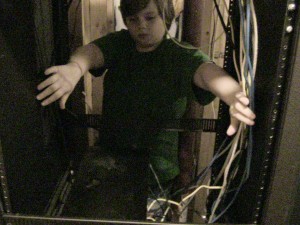
Then Leo held the cabling back while I loaded the new server into the rack. We keep power cables on the left side and signal cables on the right (from the front). The gap between the sides and the rails makes for nice channels to keep the cabling neat… well, ok, neat enough ;-). If this rack were living in a data center then it wouldn’t be modified very often and all of the cables would be tightly controlled. This rack lives at the Mad Lab where things are frequently moved around and so we allow for a little more chaos.

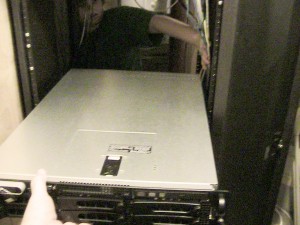
Once the server is over the first brace it’s easy to manage. In fact, it’s pretty light as servers go. This kind of thing can be done with one person but it’s always best to have a helper.

Power Left, Signals Right

Power Left, Signals Right

Slides right in with a little help

Slides right in with a little help

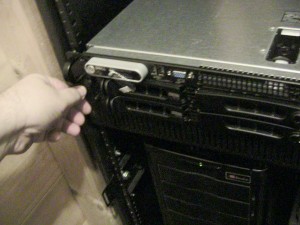
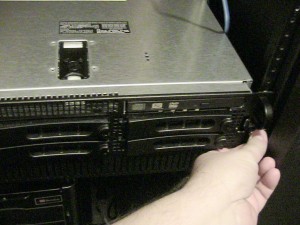
Once the server was in place we tightened up the thumb screws on the front. If the braces weren’t in the right place this wouldn’t have worked because the screw holes wouldn’t have aligned. Leo and Ian had it nailed and the screws mated up perfectly.

Tighten the left thumb screw

Tighten the left thumb screw

Tighten the right thumb screw

Tighten the right thumb screw

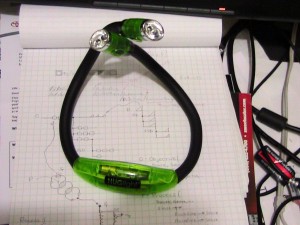
With the physical installation out of the way it was time to wire up the beast. It’s a bit dark in the back of the rack so we needed some light. Luckily this year I got one of the best stocking stuffers ever – a HUGlight.

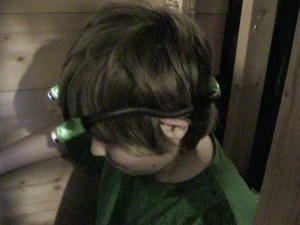
The LEDs are bright and the bendable arms are sturdy. You can bend the thing to hang it in your work area, snake it through holes to put light where you need it, stand it on the floor pointing up at your work… The possibilities are endless. Leo thought of a way to use it that I hadn’t yet – he made it into a hat!

HUGLight - Best stocking stuffer ever!

HUGLight - Best stocking stuffer ever!

Leo wears HUGlight like a hat

Leo wears HUGlight like a hat

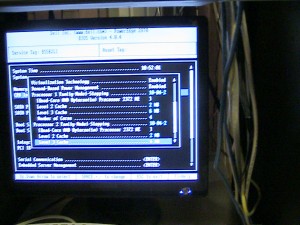
Once the wiring was complete I threw the keyboard and monitor on top, plugged it in, and pushed the button (smoke test). Sure enough, as I feared, the server sounded like a jet engine when it started up. For a moment it was the loudest thing in the house and clearly could not live there next to the studio if it was going to be that loud… either that or I would have to turn it off from time to time, and I sure didn’t want to do that.

Then after a few seconds the fans throttled back and it became surprisingly quiet! In fact it turns out that with the door of the rack closed and the existing acoustic treatments I’ve made to the room this server will be fine right where it is. I will continue to treat the room to isolate it (that project is only just beginning) but for now what we have is sufficient. What a relief.

Within a minute or two I had the system configured and ready for ESXi.

It Is Alive!

It Is Alive!

The keyboard and monitor wouldn’t be needed for long. One of the best decisions I made was to order the server with DRAC installed. Once it was configured with an IP address and connected to the network I could access the console from anywhere on my control network with my web browser (and Java). Not only that but all of the health monitors (and then some) are also available. It was well worth the few extra dollars it cost. I doubt I’ll ever install another server without it.

Back in the day we needed to physically lay hands on servers to restart them; and we had to use special software and hardware gadgets to diagnose power or temperature problems – up hill, both ways, bare feet, in the snow!! But I digress…

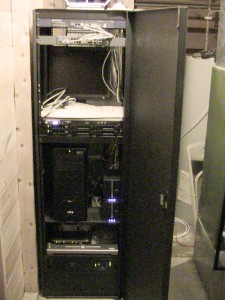
Mad Rack After

Mad Rack After

After that I installed ESXi, pulled out the disk and closed the door. I was able to perform the rest of the setup from my desk:

  • Configured the ESXi password, control network parameters, etc.
  • Downloaded vSphere client and installed it.
  • Connected to the ESXi host, installed the license key.
  • Setup the first VM to run Ubuntu 9.10 with multiple CPUs.
  • … and so on

The server has now been alive and doing real work for a few days and continues to run smoothly. In fact I’ve not had to go back into that room since except to look at the blinking lights (a perk).

We’re doing a lot of cross-platform software development these days, and that means doing a lot of cross-platform testing too.

The best way to handle that these days is with virtual computing since it allows you to use one box to run dozens of platforms (operating system and software configurations) at once – even simultaneously if you wish (and we do).

Until recently we were outsourcing this part of our operation but that turned out to be very painful. To date nobody in the cloud-computing game quite has the interface we need for making this work. In particular we need the ability to keep pristine images of platforms that we can load on demand. We also need the ability to create new reusable snapshots as needed.

All of this exists very nicely in VMWare, of course, but to access it you really need to have your own VMWare setup in-house (at least that’s true at the moment). So I ordered a new Dell Power Edge 2970 to run at the Mad Lab with ESXi 4.

(LeoInstallThatForMe)

Around the Mad Lab we like to take every opportunity to teach, learn, and experiment so I enlisted Leo to get the server installed.

The first thing that occurred to me after it arrived is that it’s big and heavy. We have a rack in the lab from our old data center in Sterling, but it’s one of the lighter-duty units so some “adaptation” would be required. Hopefully not too much.

(MadRackBefore)

Another concern that I had is that this server might be too loud. After all, boxes like this are used to living in loud concrete and steel buildings where people do not go. I need to run this box right next to the main tracking room in the recording studio. No matter though – it must be done, and I’ve gotten pretty good at treating noisy equipment so that it doesn’t cause problems. In fact, the rack lives in a special utility room next to the HVAC so everything I do in there to isolate that room acoustically will help with this too.

Opening the box we quickly discovered I was right about the size. The rail kit that came with the device was clearly too large for the rack. We would have to find a different solution.

(GoshThoseRailsLookBig)

Clearly the server itself would stick out the back of the rack a bit so I had Leo measure it’s depth and check that against the depth we had available in the rack.

(HowLongIsIt)

As it turned out we needed to move the rack forward a bit in order to leave enough space behind it. The rack is currently installed in front of a structural column and some framing. Once Leo measured the available distance we moved the rack forward about 8 inches. That provided plenty of space for the new server and access to it’s wiring.

(MustMoveTheRackToMakeRoom)

That solved one problem but we still had the issue of the rails being too long for the rack. Normally I might take a hack saw to them and modify them to fit but in this case that would not be possible – and besides: the rail kit from Dell is great and we might use it later if we ever move this server out of the Mad Lab and into one of the data centers.

Luckily I’d solved this problem before and it turned out we had the parts to do it this time as well. Each of these slim-line racks has a number of cross members installed for ventilation and stability. These are pretty tough pieces of kit though so they can be used in a pinch to act as supports for the front and back of a long server like this. Just our luck we had two installed – they just needed to be moved a bit.

(WeWillUseTheseBracesInsteadOfRails)

I explained to Leo how the holes are drilled in a rack, the concept of “units” (1-U, 2-U, etc), and where I wanted the new server to live. Leo measured the height and Ian counted holes to find the new locations for the front and back braces.

(IanAndLeoInstallTheBackSupport)

Then Leo held the cabling back while I loaded the new server into the rack. We keep power cables on the left side and signal cables on the right (from the front). The gap between the sides and the rails makes for nice channels to keep the cabling neat… well, ok, neat enough ;-). If this rack were living in a data center then it wouldn’t be modified very often and all of the cables would be tightly controlled. This rack lives at the Mad Lab where things are frequently moved around and so we allow for a little more chaos.

(HoldPowerOnLeftSignalOnRight)

Once the server is over the first brace it’s easy to manage. In fact, it’s pretty light as servers go. This kind of thing can be done with one person but it’s always best to have a helper.

(SlidesRigthIn)

Once the server was in place we tightened up the thumb screws on the front. If the braces weren’t in the right place this wouldn’t have worked because the screw holes wouldn’t have aligned. Leo and Ian had it nailed and the screws mated up perfectly.

(TightenTheLeftThumbScrew) (TightenTheRightThumbScrew)

With the physical installation out of the way it was time to wire up the beast. It’s a bit dark in the back of the rack so we needed some light. Luckily this year I got one of the best stocking stuffers ever – a HUGlight.

(BestStockingStufferEver)

The LEDs are bright and the bendable arms are sturdy. You can bend the thing to hang it in your work area, snake it through holes to put light where you need it, stand it on the floor pointing up at your work… The possibilities are endless. Leo thought of a way to use it that I hadn’t yet – he made it into a hat!

(LeoWithHugLightOn)

Once the wiring was complete I threw the keyboard and monitor on top, plugged it in, and pushed the button (smoke test). Sure enough, as I feared, the server sounded like a jet engine when it started up. For a moment it was the loudest thing in the house and clearly could not live there next to the studio if it was going to be that loud… either that or I would have to turn it off from time to time, and I sure didn’t want to do that.

Then after a few seconds the fans throttled back and it became surprisingly quiet! In fact it turns out that with the door of the rack closed and the existing acoustic treatments I’ve made to the room this server will be fine right where it is. I will continue to treat the room to isolate it (that project is only just beginning) but for now what we have is sufficient. What a relief.

Within a minute or two I had the system configured and ready for ESXi.

(ItIsAlive)

The keyboard and monitor wouldn’t be needed for long. One of the best decisions I made was to order the server with DRAC installed. Once it was configured with an IP address and connected to the network I could access the console from anywhere on my control network with my web browser (and Java). Not only that but all of the health monitors (and then some) are also available. It was well worth the few extra dollars it cost. I doubt I’ll ever install another server without it.

Back in the day we needed to physically lay hand on servers to restart them; and we had to use special software and hardware gadgets to diagnose power or temperature problems – up hill, both ways, bare feet, in the snow!! But I digress…

(MadRackAfter)

After that I installed ESXi, pulled out the disk and closed the door. I was able to perform the rest of the setup from my desk:

  • Configured the ESXi password, control network parameters, etc.

  • Downloaded vSphere client and installed it.

  • Connected to the ESXi host, installed the license key.

  • Setup the first VM to run Ubuntu 9.10 with multiple CPUs.

  • … and so on

The server has now been alive and doing real work for a few days and continues to run smoothly. In fact I’ve not had to go back into that room since except to look at the blinking lights (a perk).