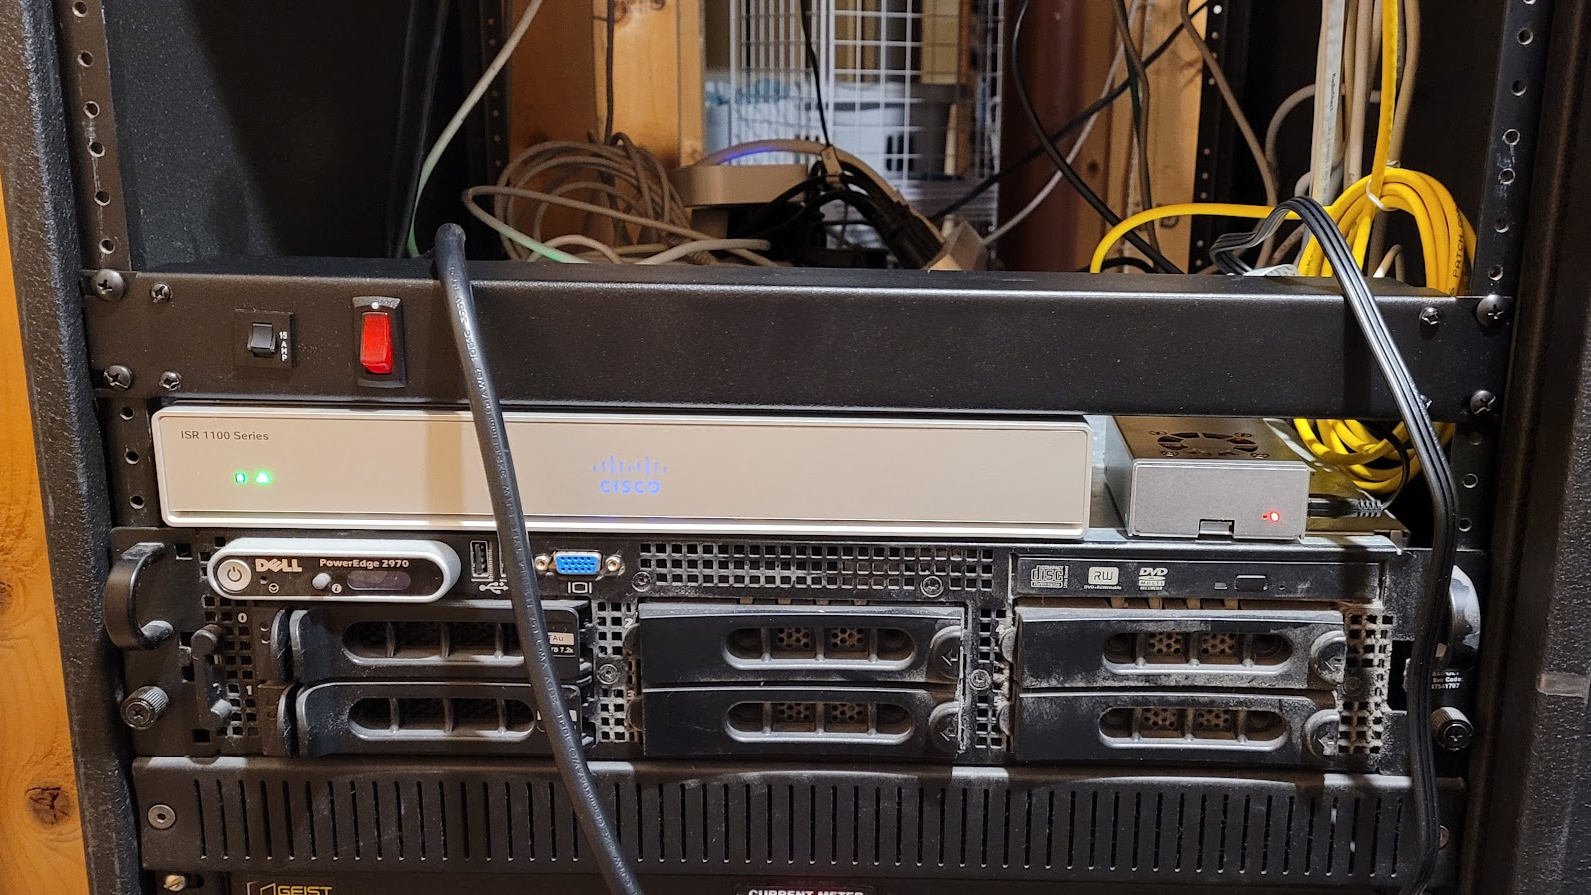
It had been a bad year for computing and storage in the lab. On the storage side I had two large Synology devices fail within weeks of each other. One was supposed to back-up the other. When they both failed almost simultaneously, their proprietary hardware made it prohibitively difficult and expensive to recover and maintain. That’s a whole other story that perhaps ends with replacing a transistor in each… But, suffices to say I’m not happy about that and the experience reinforced my position that proprietary hardware of any kind is not welcome here anymore… (so if it is here, it’s because there isn’t a better option and such devices from now on are always looking for non-proprietary replacements…)
On the computing side, the handful of servers I had were all of: power hungry, lacking “grunt,” and a bit “long in the tooth.” Not to mention, the push in my latest research is strongly toward increasing the ratio of Compute to RAM and Storage so any of the popular enterprise trends toward ever larger monolithic devices really wouldn’t fit the profile.
I work increasingly on resilient self organizing distributed systems; so the solution needs to look like that… some kind of “scalable fabric” composed of easily replaceable components, no single points of failure (to the extent possible) but also with a reasonably efficient power footprint.
I looked at a number of main-stream high performance computing scenarios and they all rubbed me the wrong way — the industry LOVES proprietary lock-in (blade servers); LOVES computing “at scale” which means huge enterprise grade servers supported by the presumption of equally huge infrastructure and support budgets (and all of the complexity that implies). All of this points in the wrong direction. It’s probably correct for the push into the cloud where workloads are largely web servers or microservices of various generic types to be pushed around in K8s clusters and so forth. BUT, that’s not what I’m doing here and I don’t have those kinds of budgets… (nor do I think anyone should lock themselves into that kind of thinking without looking first).
I have often looked to implement SCIFI notions of highly modular computing infrastructure… think: banks of “isolinear chips” on TNG, or the glowing blocks in the HAL 9000. The idea being that the computing power you need can be assembled by plugging in generic collection of self-contained, self-configuring system components that are easily replaced and reasonably powerful; but together can be merged into a larger system that is resilient, scalable, and easy to maintain. Perfect for long space journeys. The hardware required for achieving this vision has always been a bit out of reach up to now.
Enter the humble NUC. Not a perfect rendition of the SCIFI vision; but pretty close given today’s world.
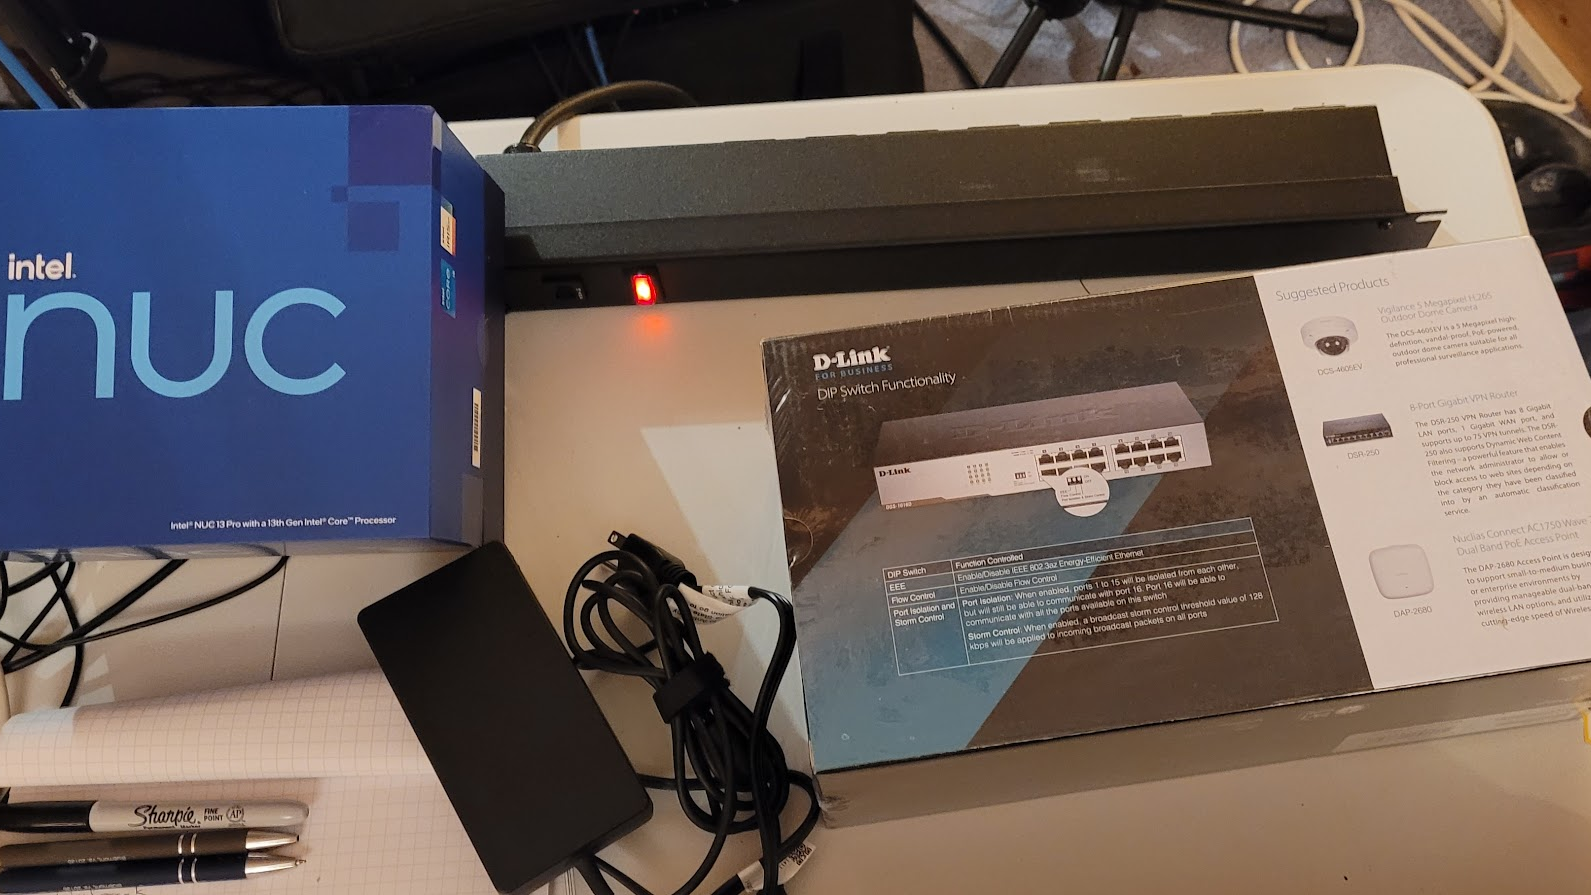
I drew up some basic specifications for what one of these computing modules might feature using today’s hardware capabilities and then went hunting to see if such a thing existed in real life. I found that there are plenty of small self-contained systems out there; but none of them are perfect for the vision I had in mind. Then, in the home-lab space, I stumbled upon a rack component designed to build clusters of NUCs… this started me looking at whether I could get NUCs configured to meet my specifications. It turns out that I could!
I reached out to my long-time friends at Affinity Computers (https://affinity-usa.com/). Many years ago I began outsourcing my custom hardware tasks to these folks – for all but the most specialized cases. They’ve consistently built customized highly reliable systems for me; and have collaborated on sourcing and qualifying components for my crazy ideas (that are often beyond the edge of convention). They came through this time as well with all of the parts I needed to build a scalable cluster of NUCs.
System Design:
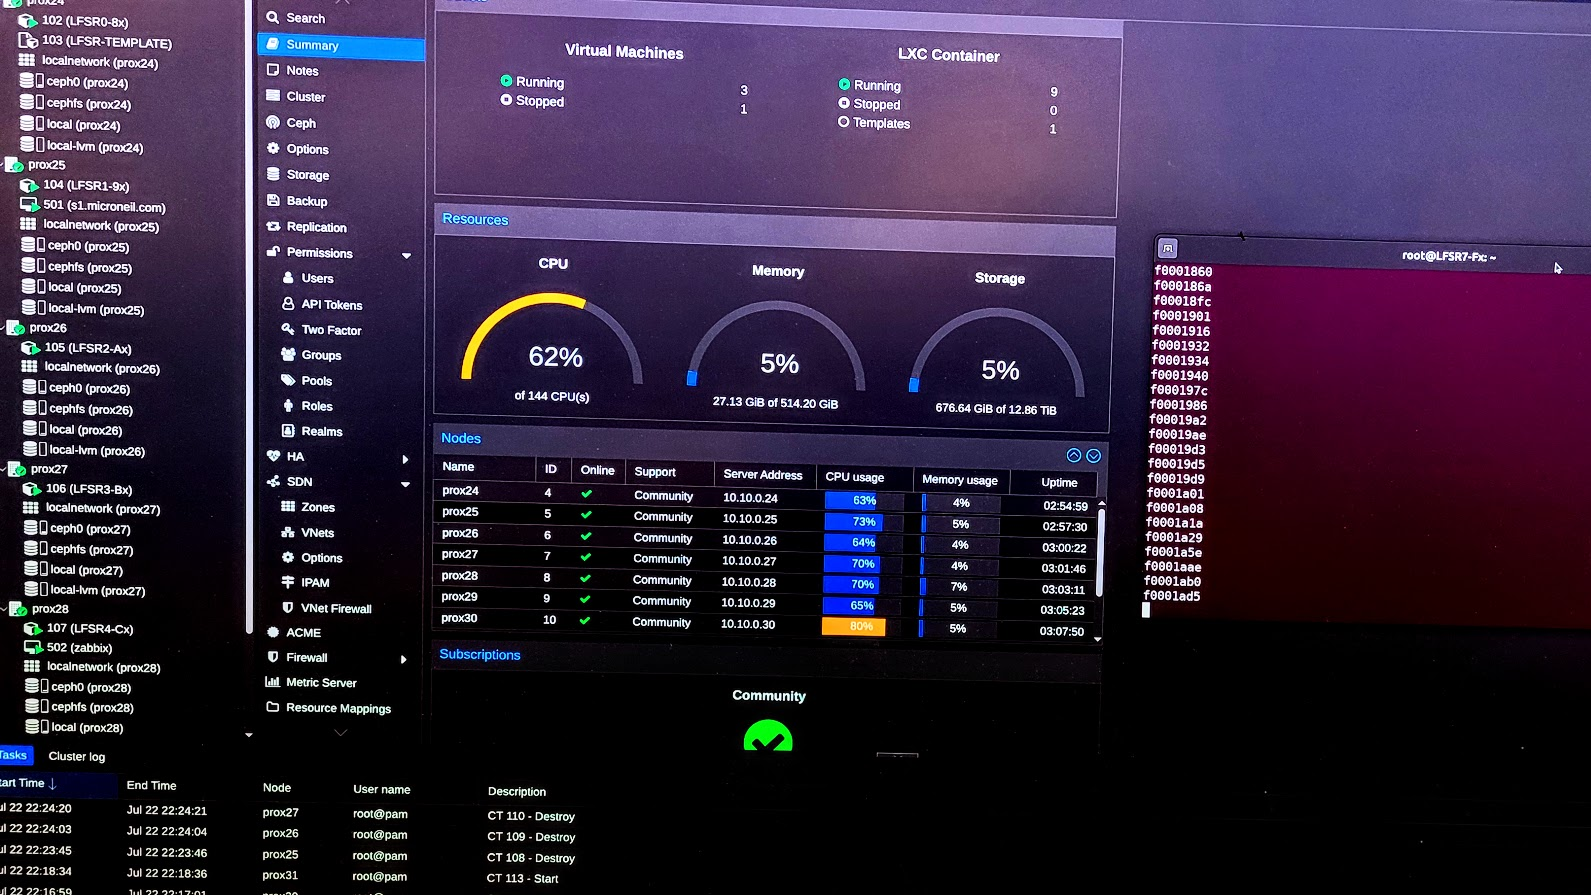
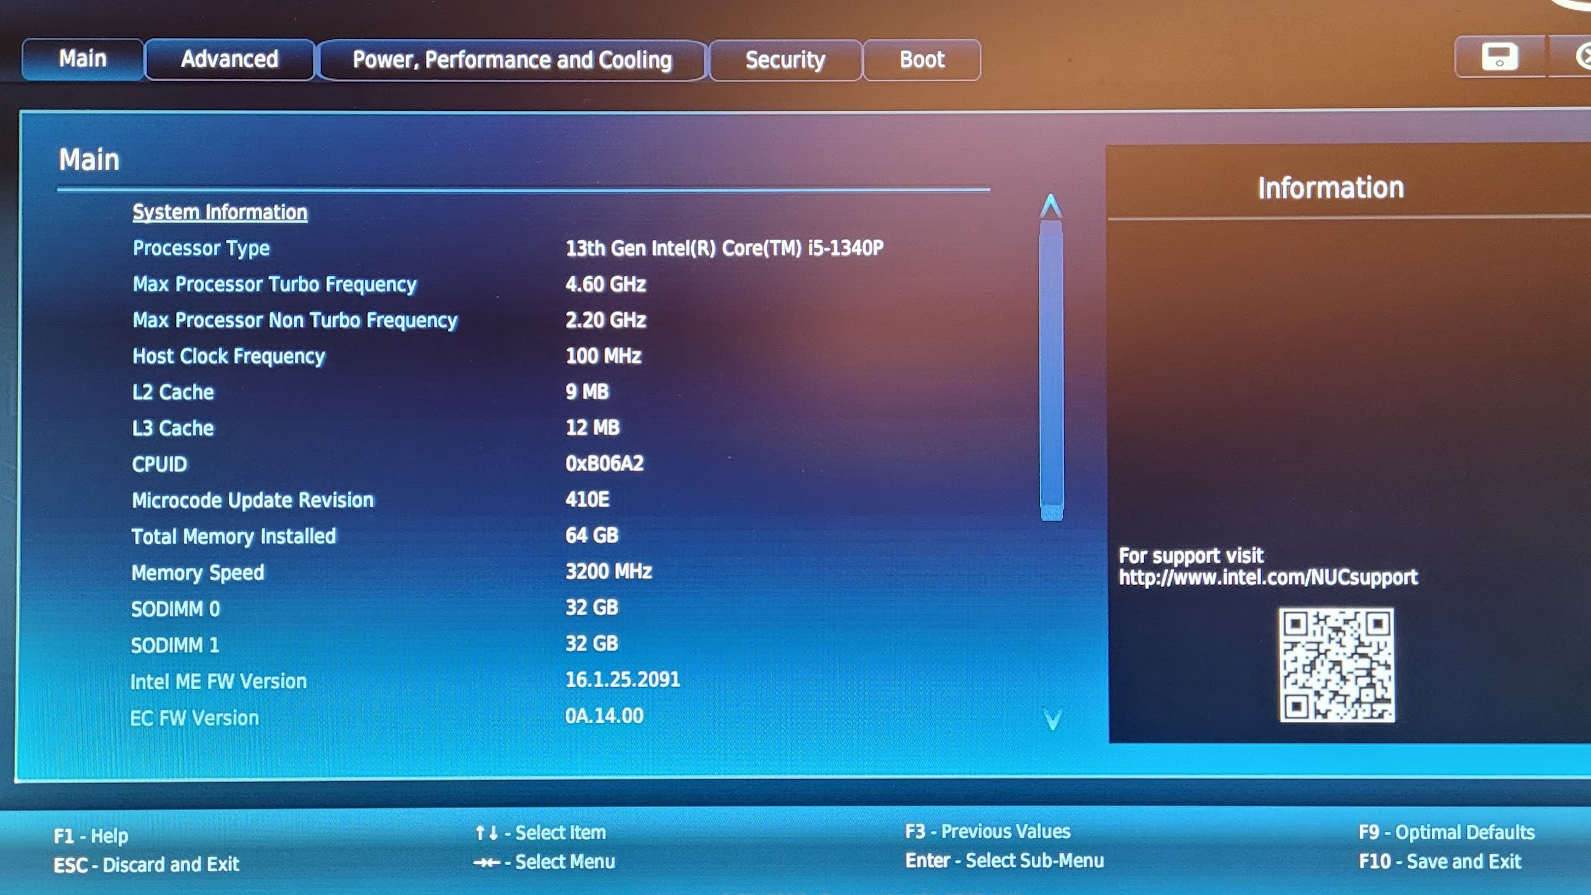
Overal specs: 128 cores, 512G RAM, 14T Storage
Each generic computing device has a generic interface connecting only via power and Ethernet. Not quite like sliding a glowing rectangle into a backplane; but close enough for today’s standards.
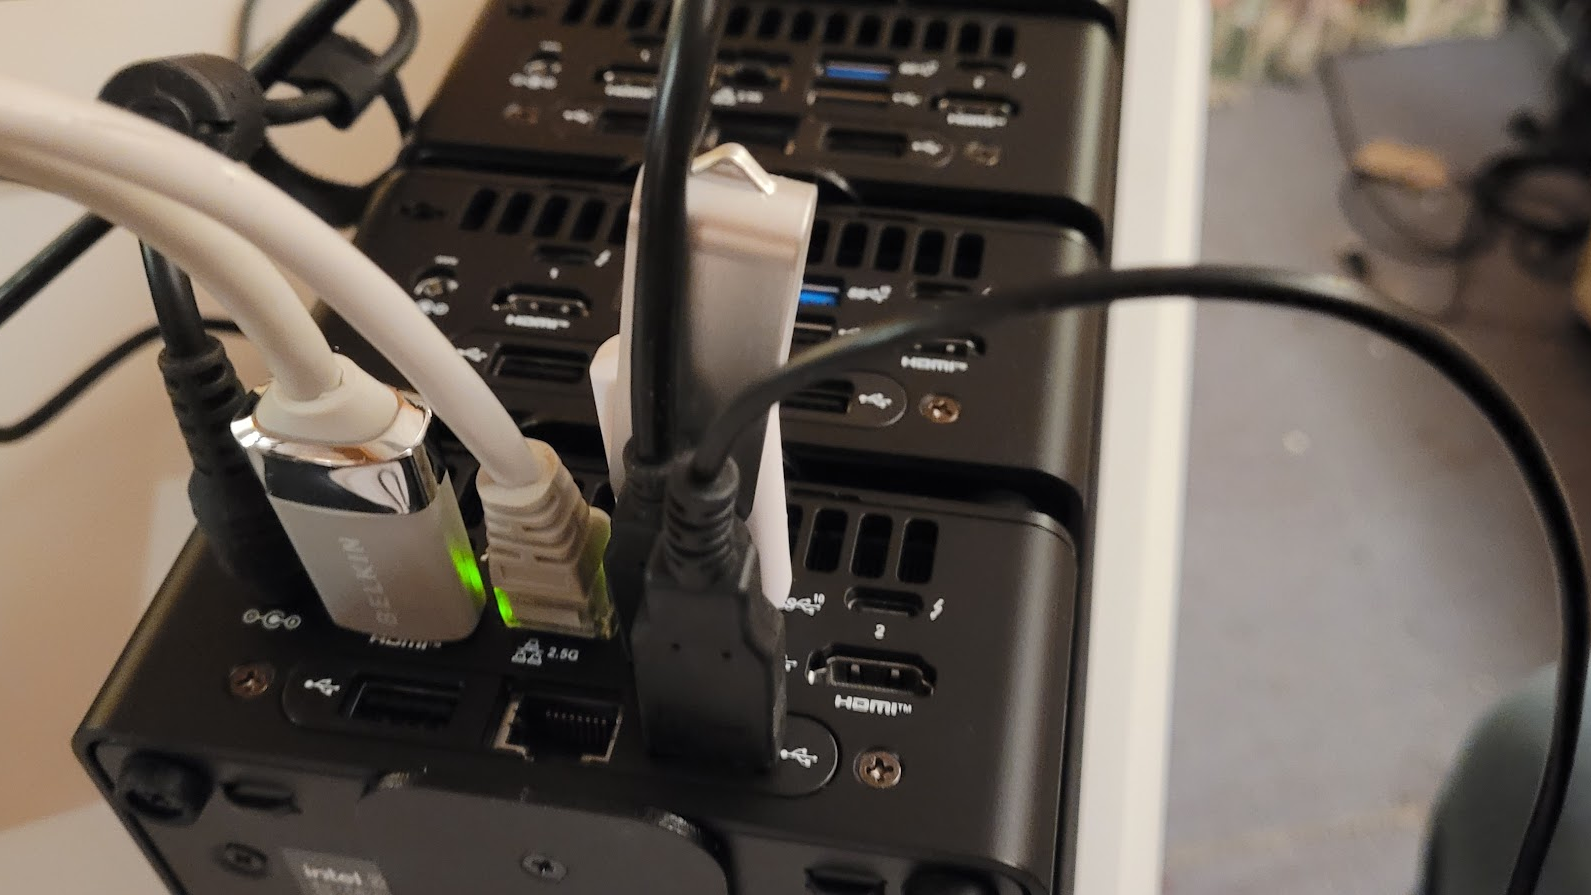
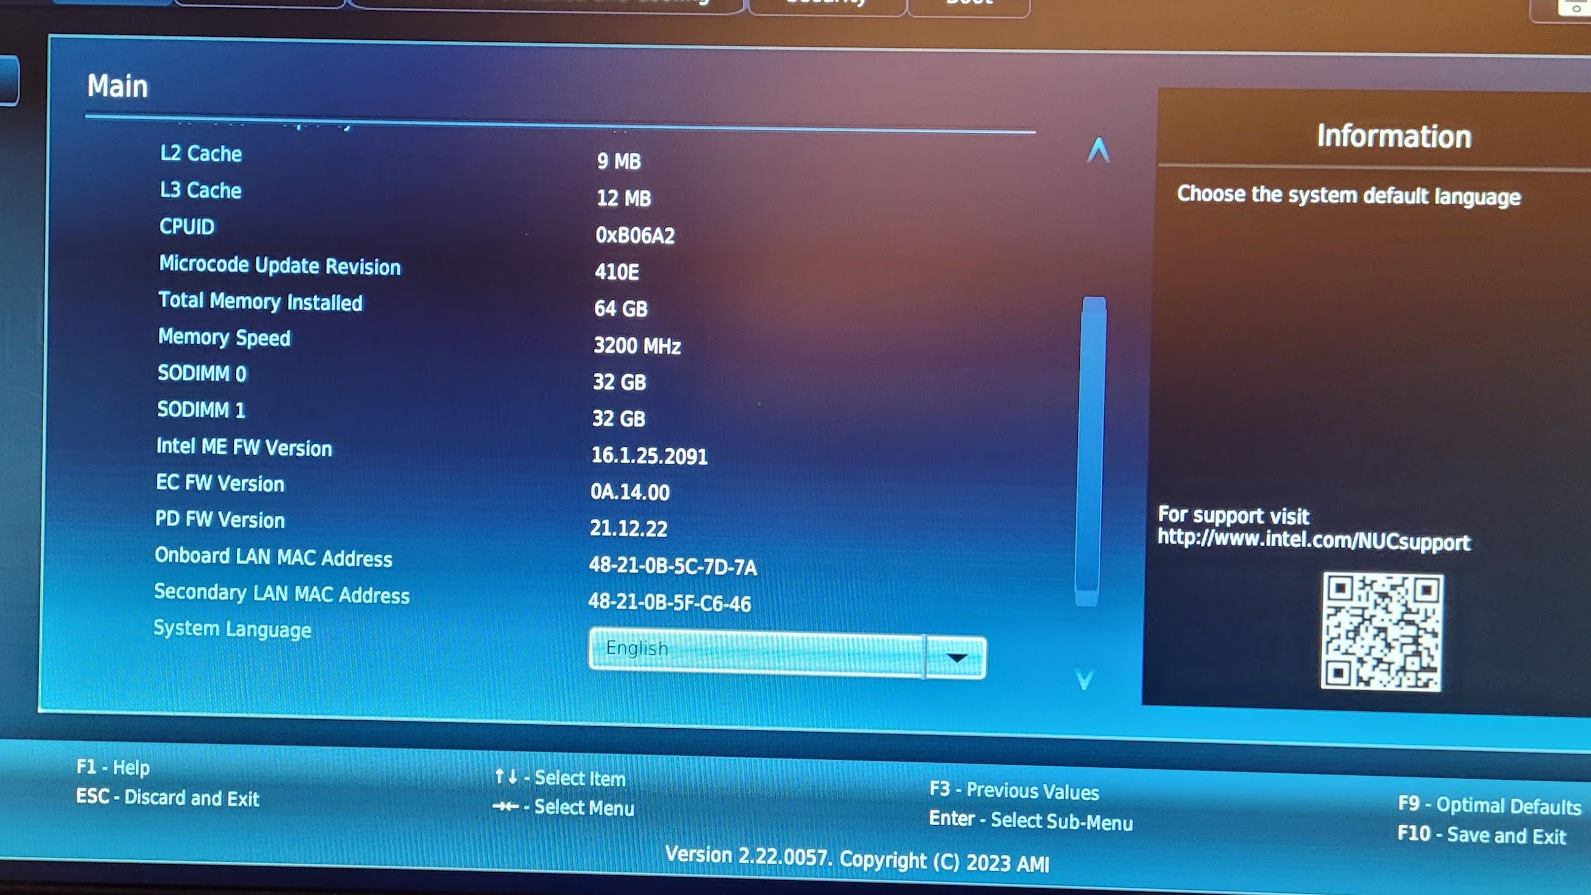
Each NUC has 16 cores, 64G of RAM, two 1G+ Network ports, and two 2T SSDs.
One network port connects the cluster to other systems and to itself.
The other network port connects the cluster ONLY to itself for distributed storage tasks using CEPH.
One of the SSDs is for the local OS.
The other SSD is part of a shared storage cluster.
Each device is a node in a ProxMox cluster that implements CEPH for shared storage.
Each has it’s own power supply.
There are no single points of failure, except perhaps the network switches and mains power.
Each device is serviceable with off-the-shelf components and software.
Each device can be replaced or upgraded with a similar device of any type (NUC isn’t the only option.)
Each device is a small part of the whole, so if it fails the overall system is only slightly degraded.
Initial Research:
Before building a cluster like this (not cheap; but not unlike a handful of larger servers), I needed to verify that it would live up to my expectations. There were several conditions I wanted to verify. First, would the storage be sufficiently resilient (so that I would never have to suffer the Synology fiasco again). Second, would it be reasonable to maintain with regard to complexity. Third, would I be able to distribute my workloads into this system as a “generic computing fabric” as increasingly required by my research. Forth… fifth… etc. There are many things I wanted to know… but if the first few were satisfied the project would be worth the risk.
I had a handful of ACER Veriton devices from previous experiments. I repurposed those to create a simulation of the cluster project. One has since died… but two of the three are still alive and part of the cluster…
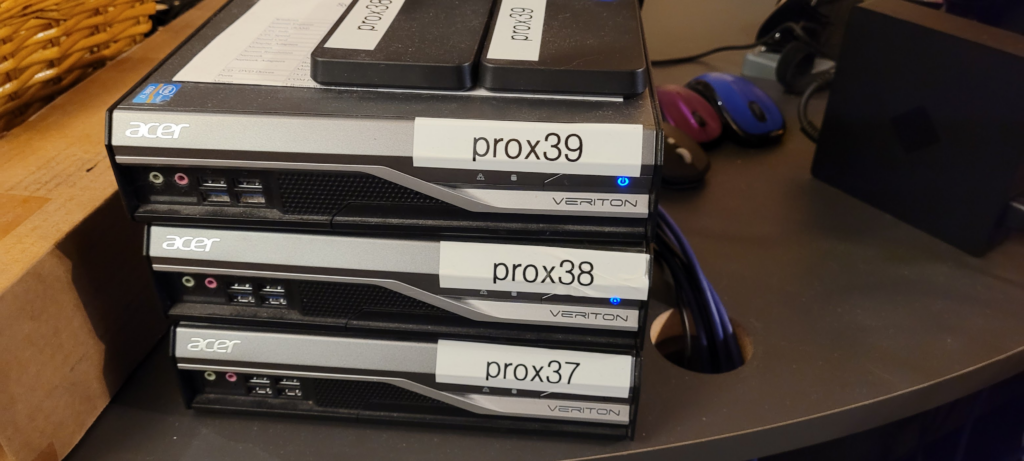
I gave each of these with an external drive (to simulate the second SSD in my NUCs) and loaded up ProxMox. That went surprisingly well… then I configured CEPH on each node using the external drives. That also went well.
I should note here that I’d previously been using VMWare and also had been using separate hardware for storage. The switch to ProxMox had been on the way for a while because VMWare was becoming prohibitively expensive, and also because ProxMox is simply better (yep, you read that right. Better. Full stop.)
Multiple reasons ProxMox is better than other options:
- ProxMox is intuitive and open.
- ProxMox runs both containers and VMs.
- CEPH is effectively baked-into ProxMox as is ZFS.
- ProxMox is lightweight, scalable, affordable, and well supported.
- ProxMox supports all of the virtual computing and high availability features that matter.
Over the course of several weeks I pushed and abused my tiny ACER cluster to simulate various failure modes and workloads. It passed every test. I crashed nodes with RF (we do radio work here)… reboot to recover, no problem. Pull the power cable, reboot to recover. Configure with bad parts, replace the good parts, recover, no problem. Pull the network cable, no problem, plug it back in, all good. Intentionally overload the system with bad/evil code in VMs and containers, all good. Variations on all of this kind of chaos both intended and by accident… honestly, I couldn’t kill it (at least not in any permanent way).
I especially wanted to abuse the shared storage via CEPH because it was a bit of a non-intuitive leap to go from having storage in a separate NAS or SAN to having it fully integrated within the computing fabric.
I had attempted to use CEPH in the past with mixed results – largely because it can be very complicated to configure and maintain. I’m pleased to say that these problems have been all but completely mitigated by ProxMox’s integration of CEPH. I was able to prove the integrated storage paradigm is resilient and performant even in the face of extreme abuse. I did manage to force the system into some challenging states, but was always able to recover without significant difficulty; and found that under any normal conditions the system never experienced any notable loss of service nor data. You gotta love it when something “just works” tm.
Building The Cluster:
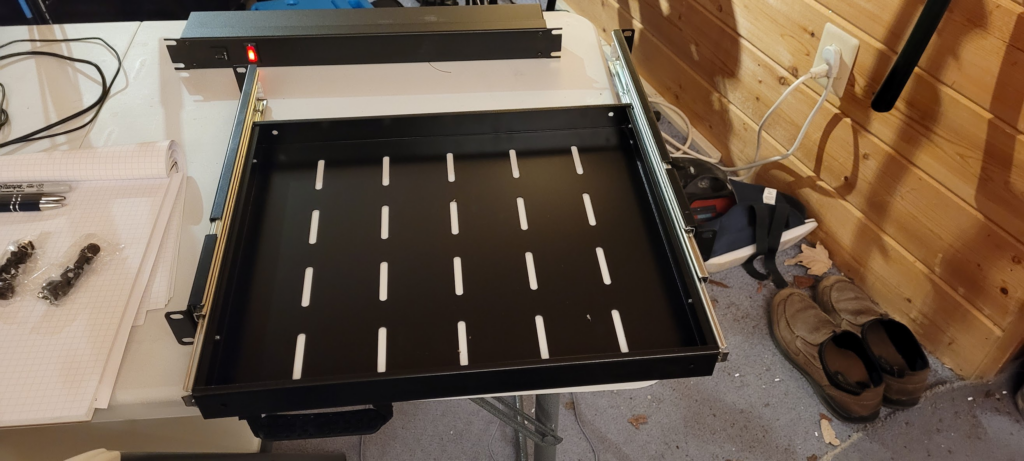
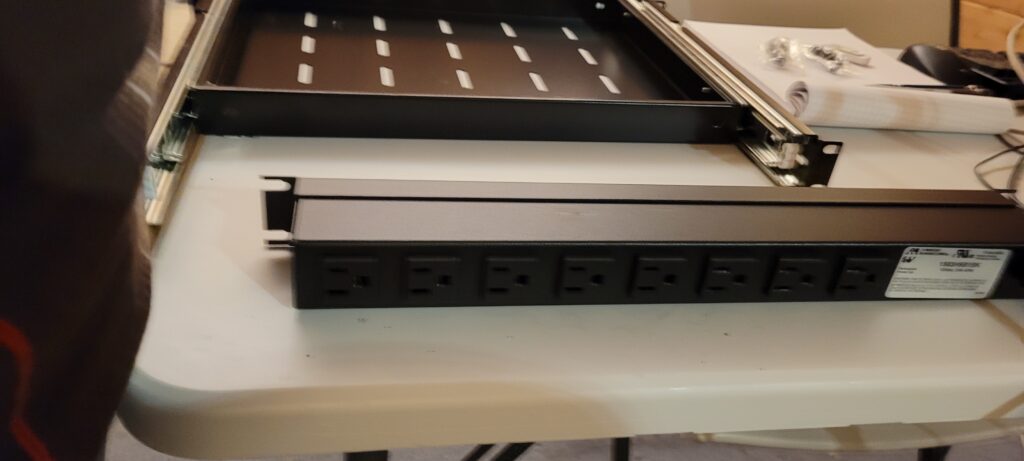
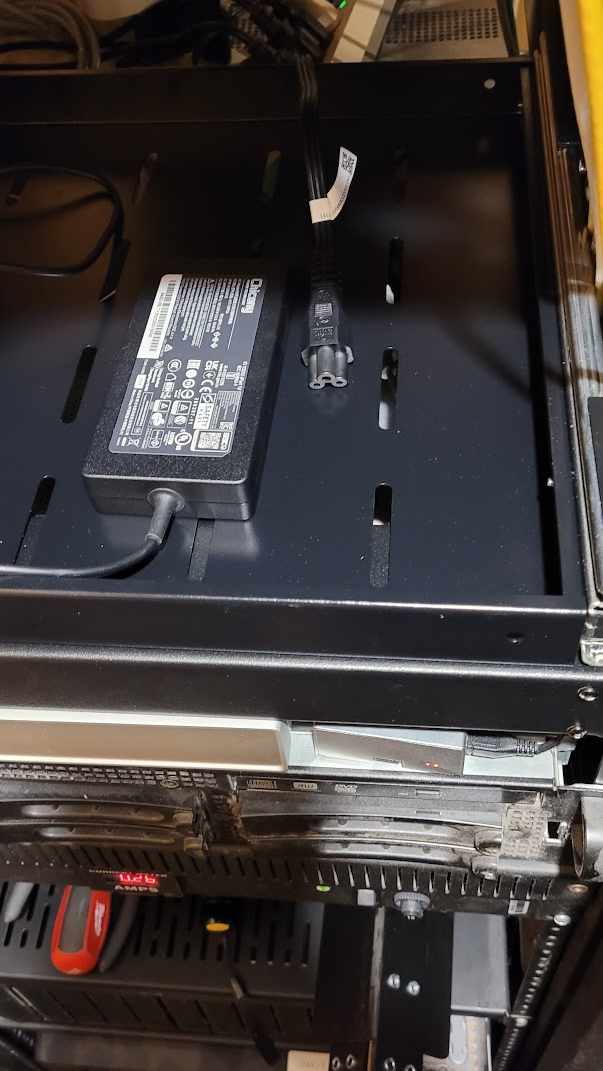
Starting with the power supply. I thought about creating a resilient, modular, battery backed power supply with multiple fail-over capabilities (since I have the knowledge and parts available to do that); but that’s a lot of work and moves further away from being off-the-shelf. I may still do something along those lines in order to make power more resilient, perhaps even a simple network of diode (mosfet) bridges to allow devices to draw from neighboring sources when individual power supplies drop out, but for now I opted to simply use the provided power supplies in a 1U drawer and an ordinary 1U power distribution switch.
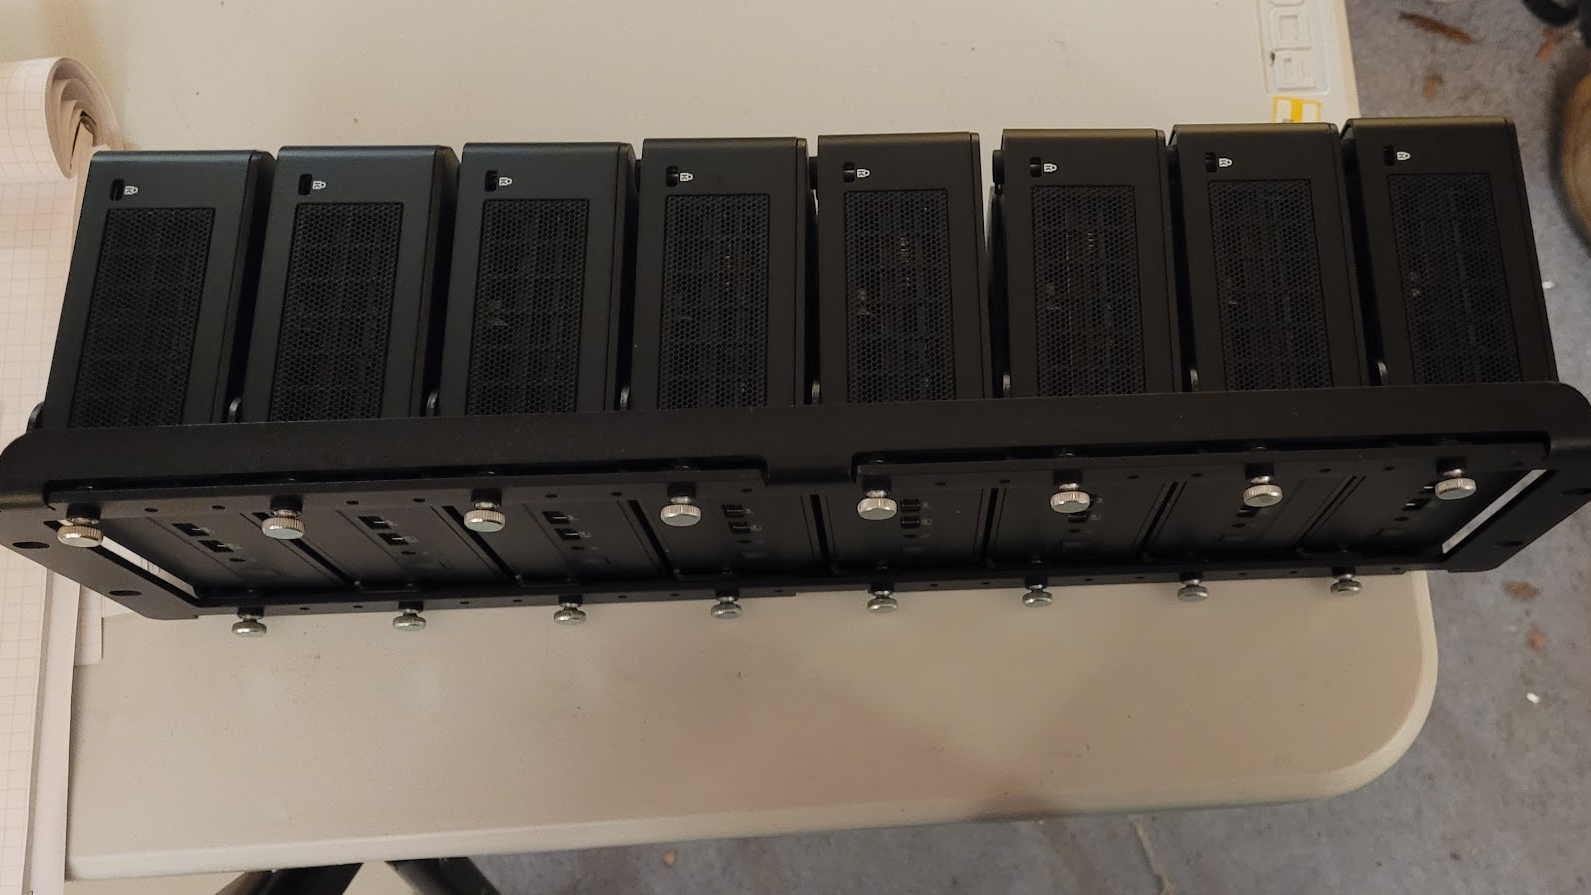
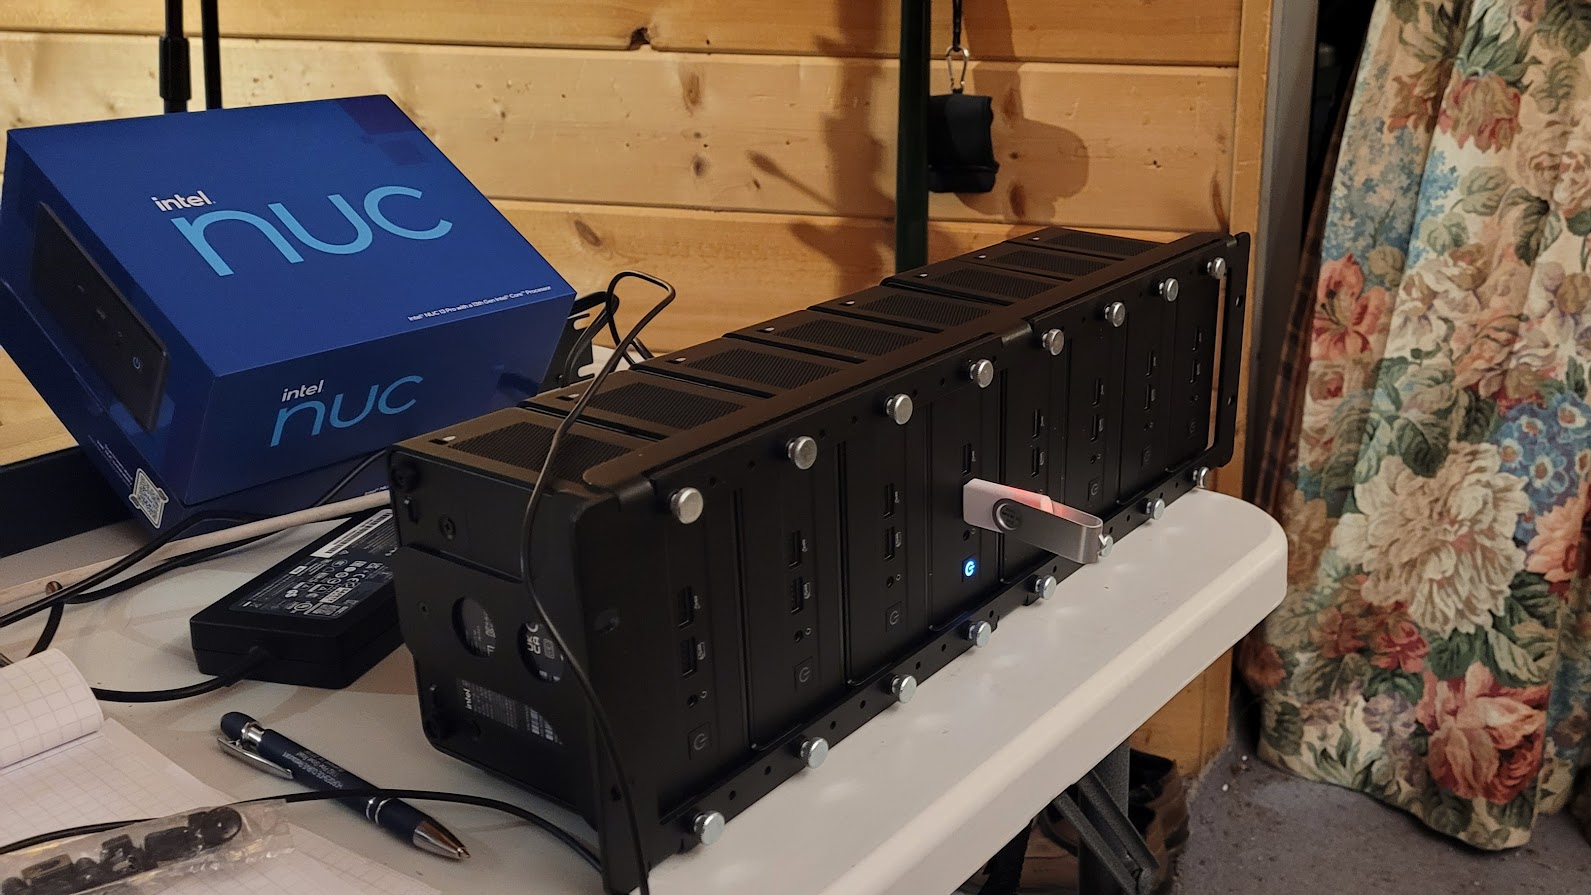
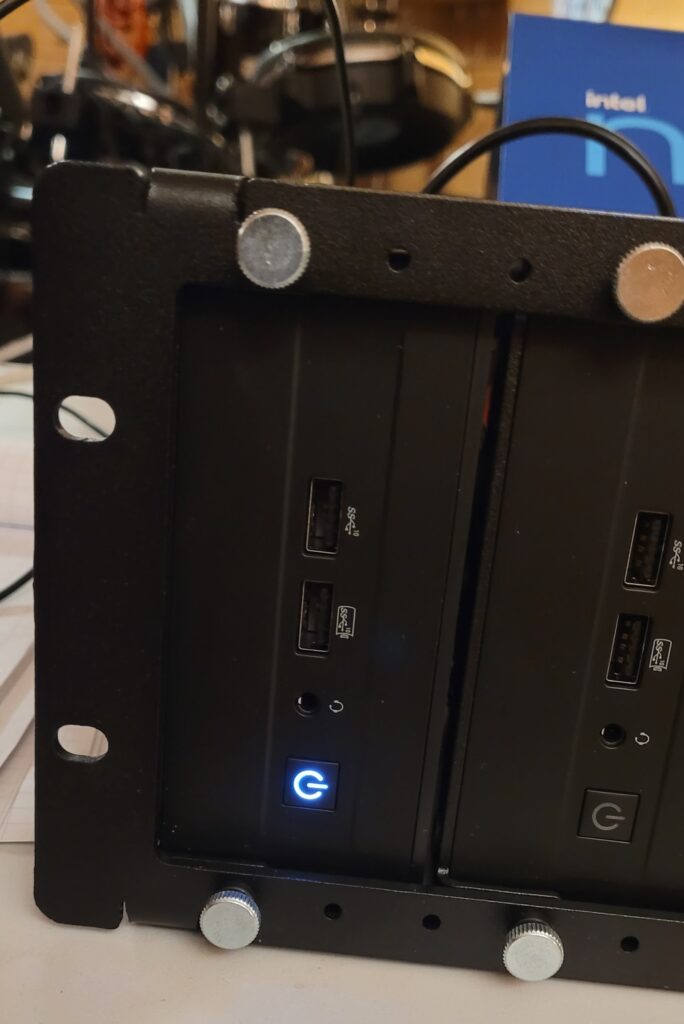
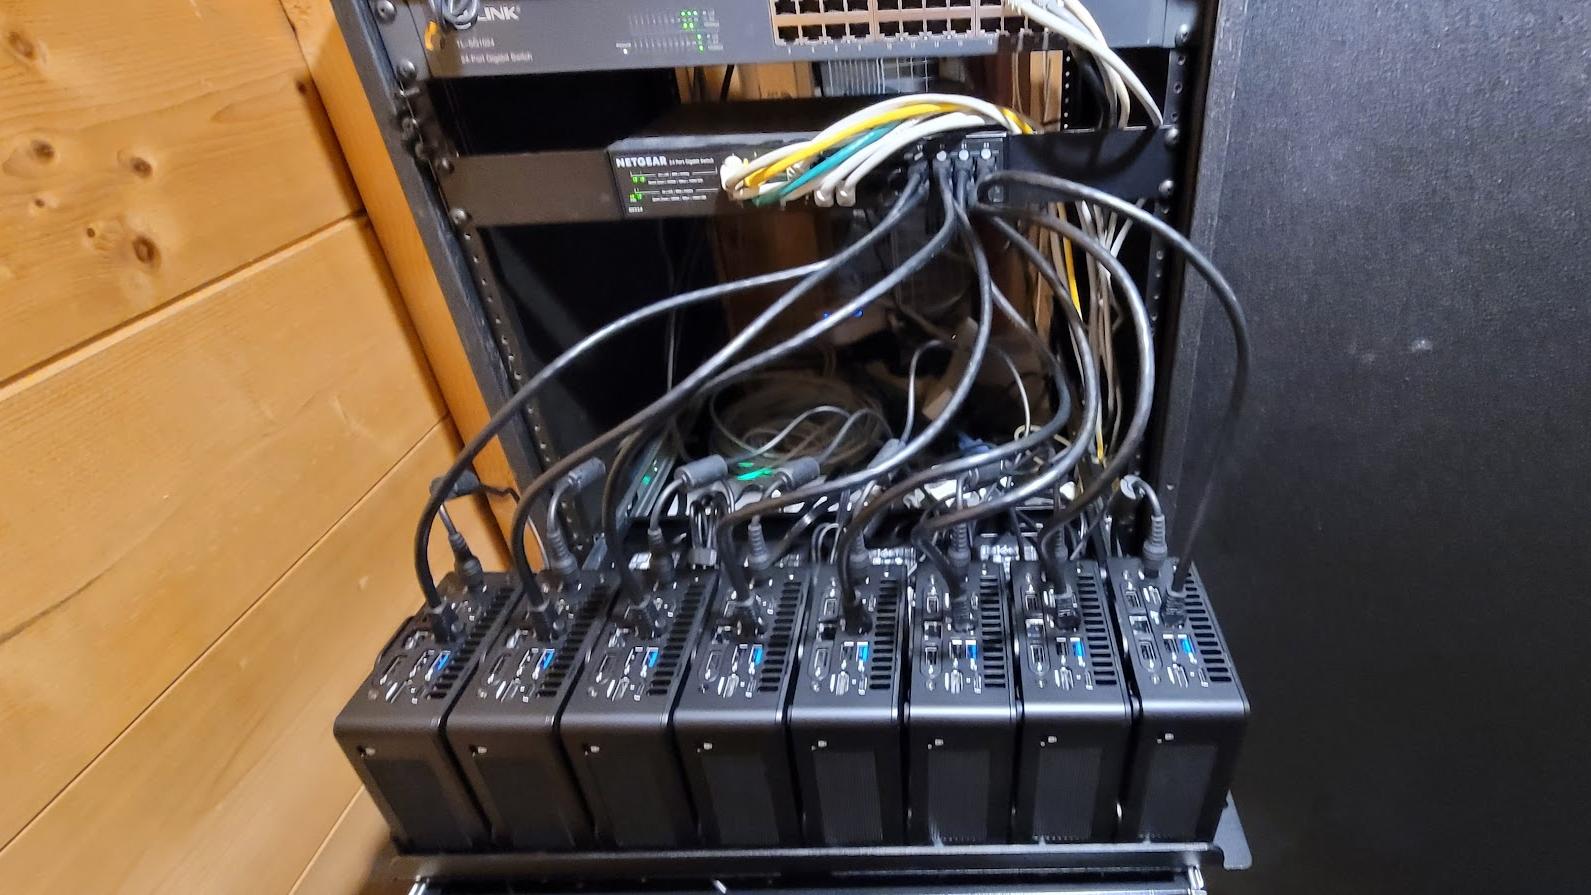
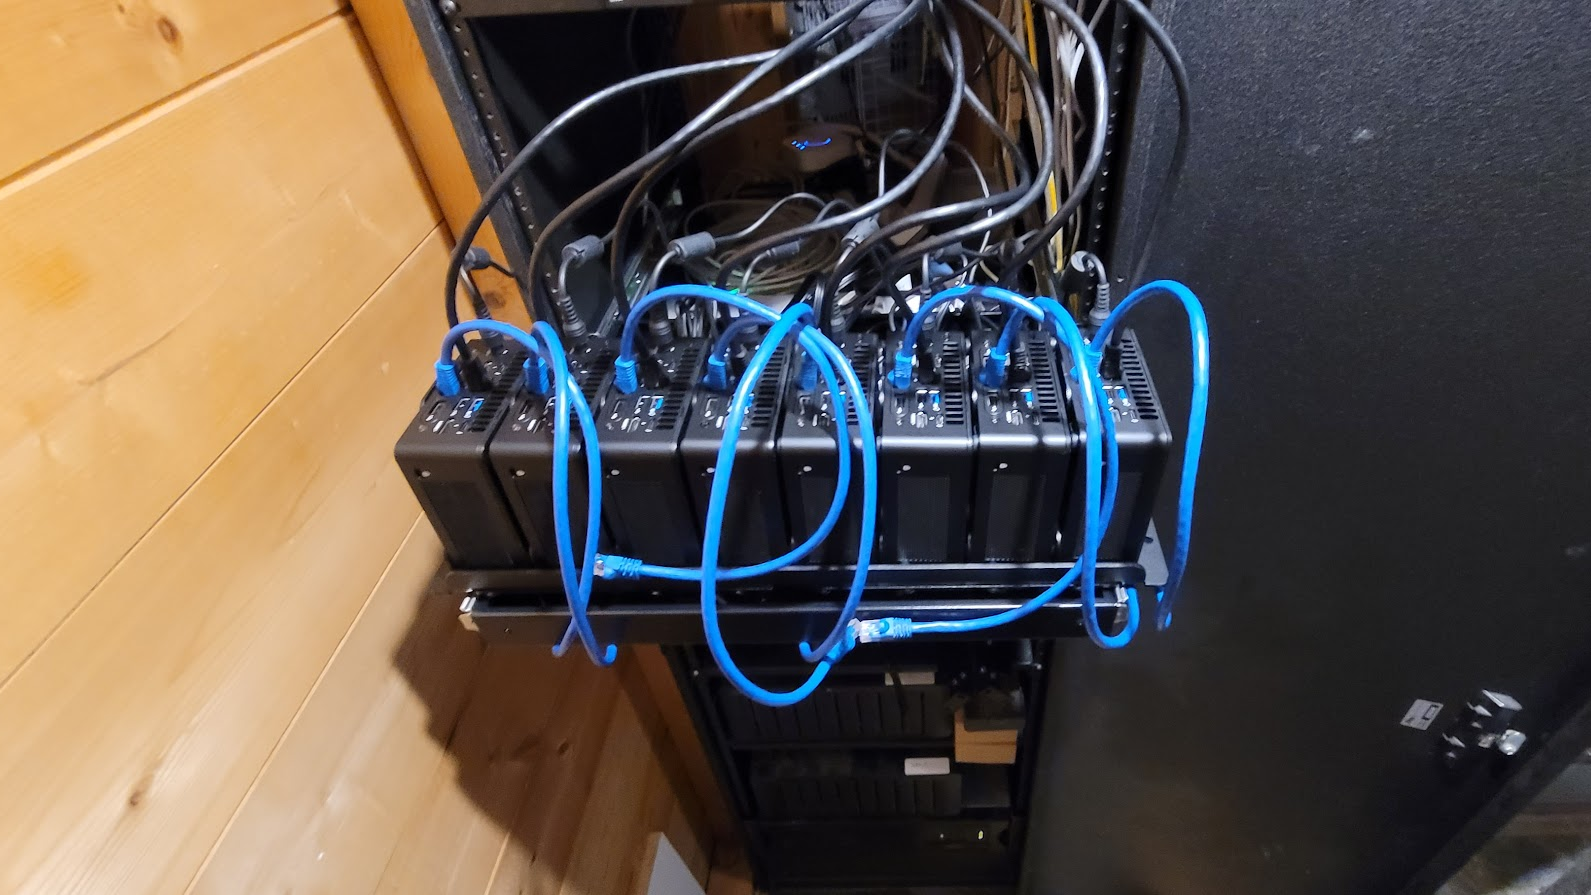
The rack unit that accommodates all of the NUCs holds 8 at a time in a 3U space. Each is anchored with a pair of thumb screws. Unfortunately, the NUCs must be added or removed from the back– I’m still looking for a rack mount solution that will allow the NUCs to pull out from the front for servicing as that would be more convenient and less likely to disturb other nodes [by accident]… but the rear access solution works well enough for now if one is careful.
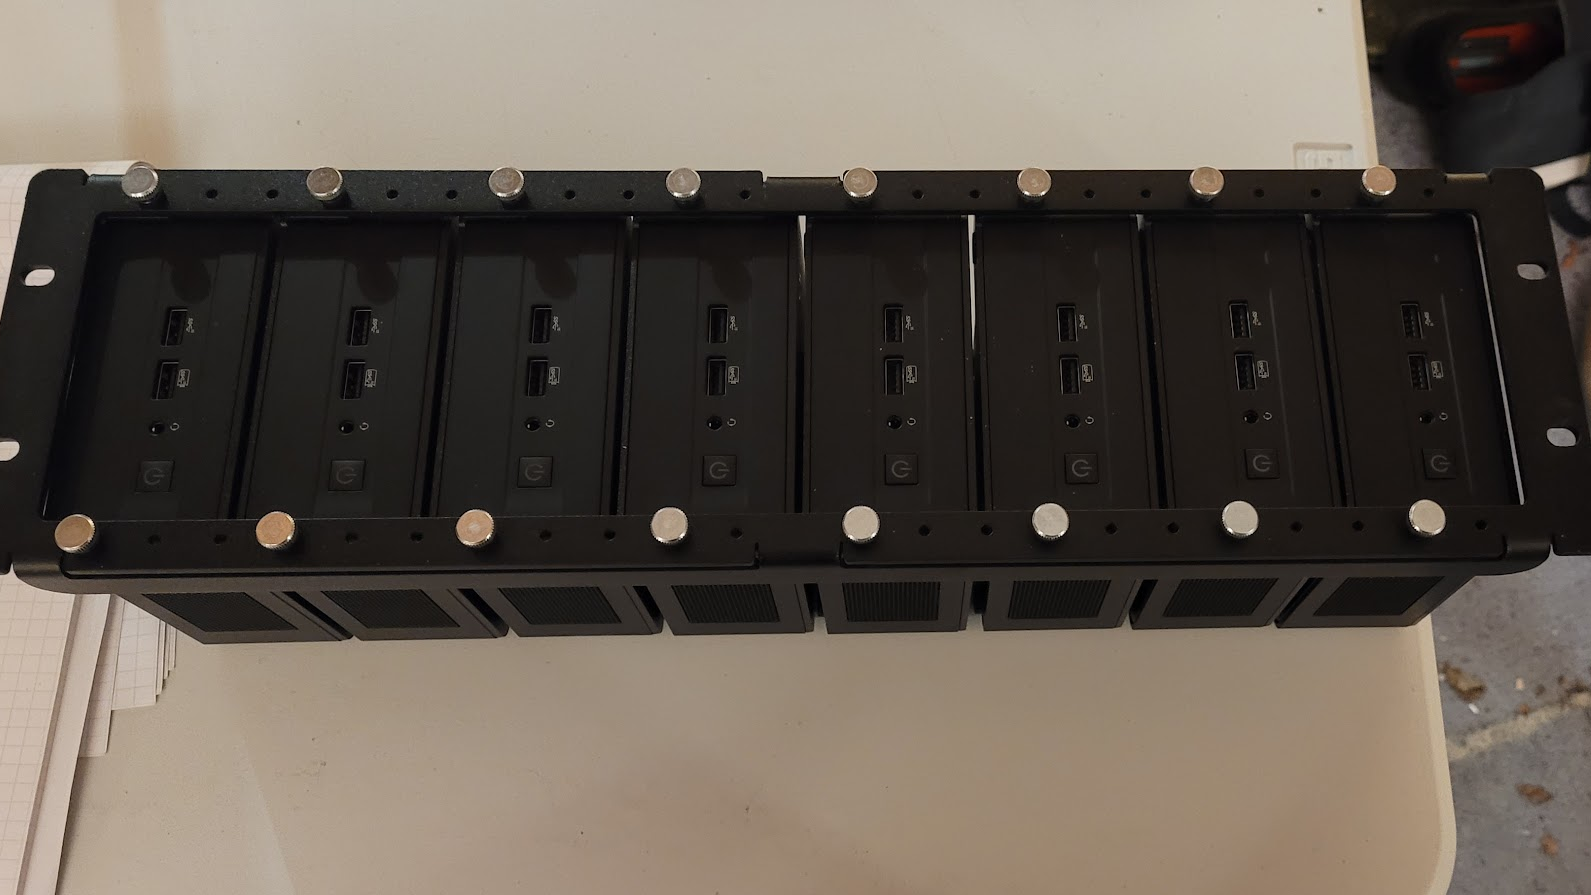
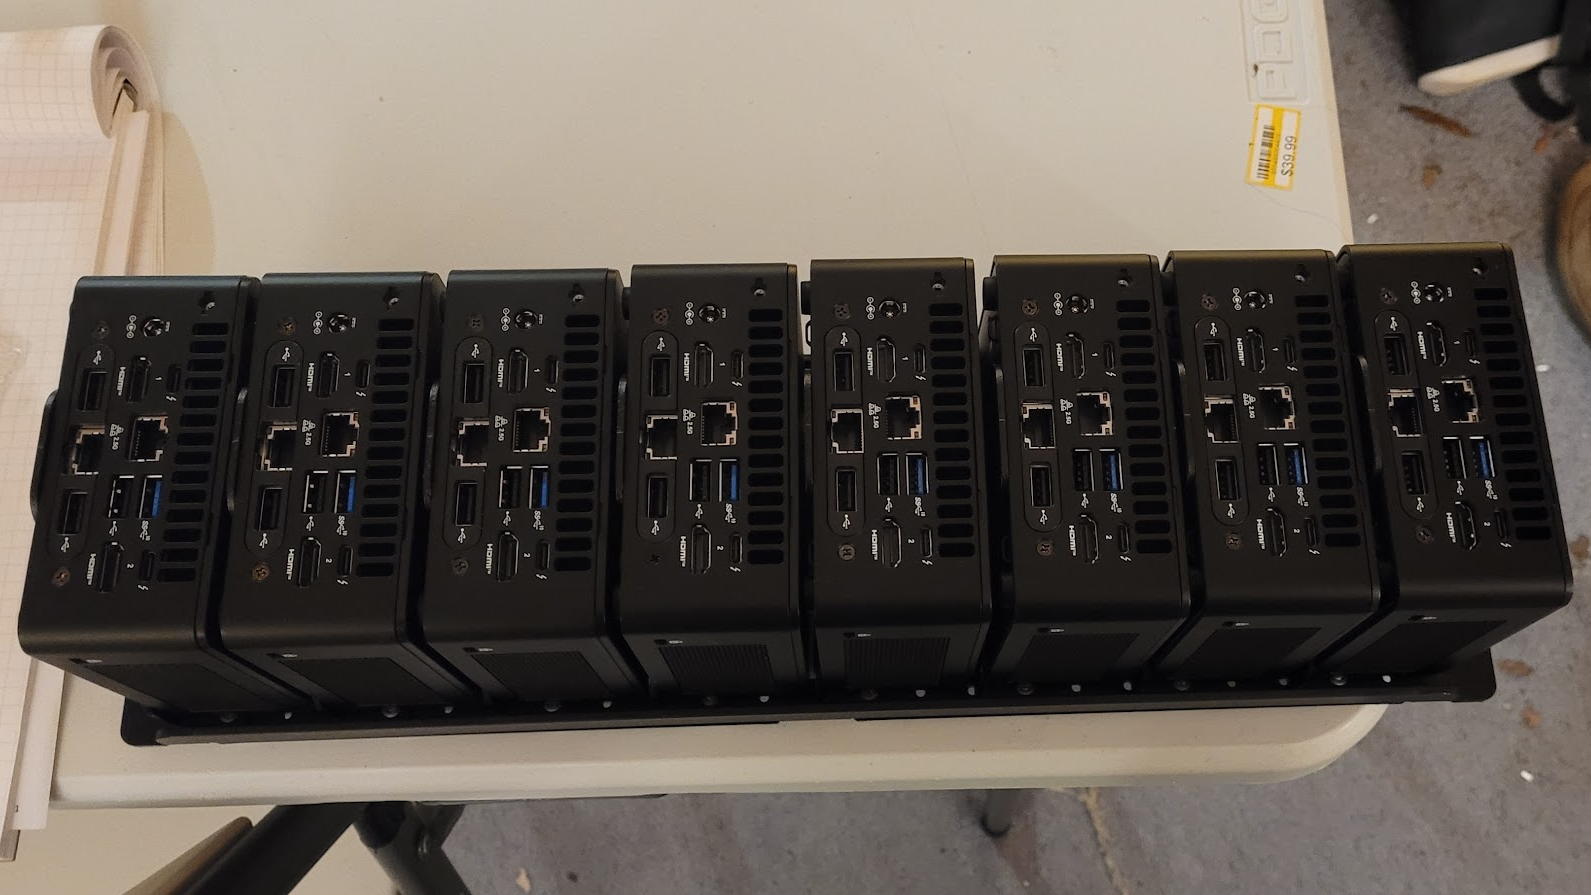
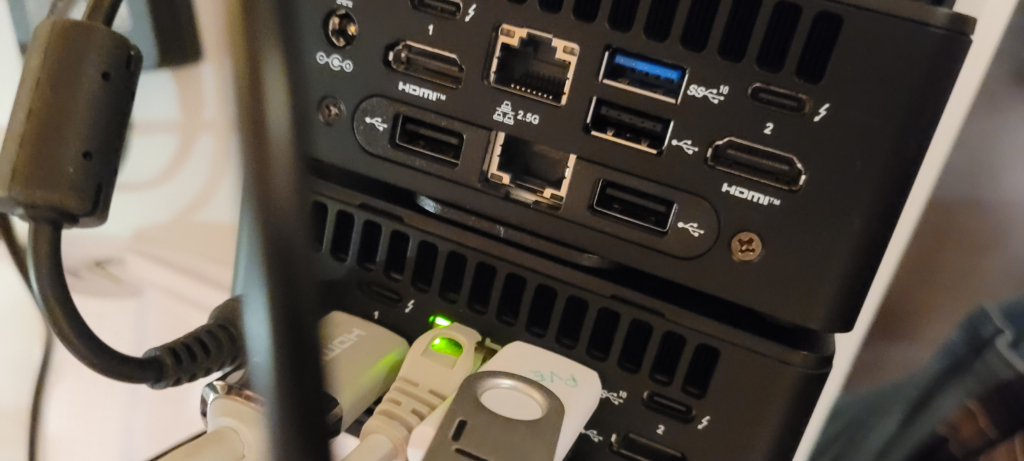
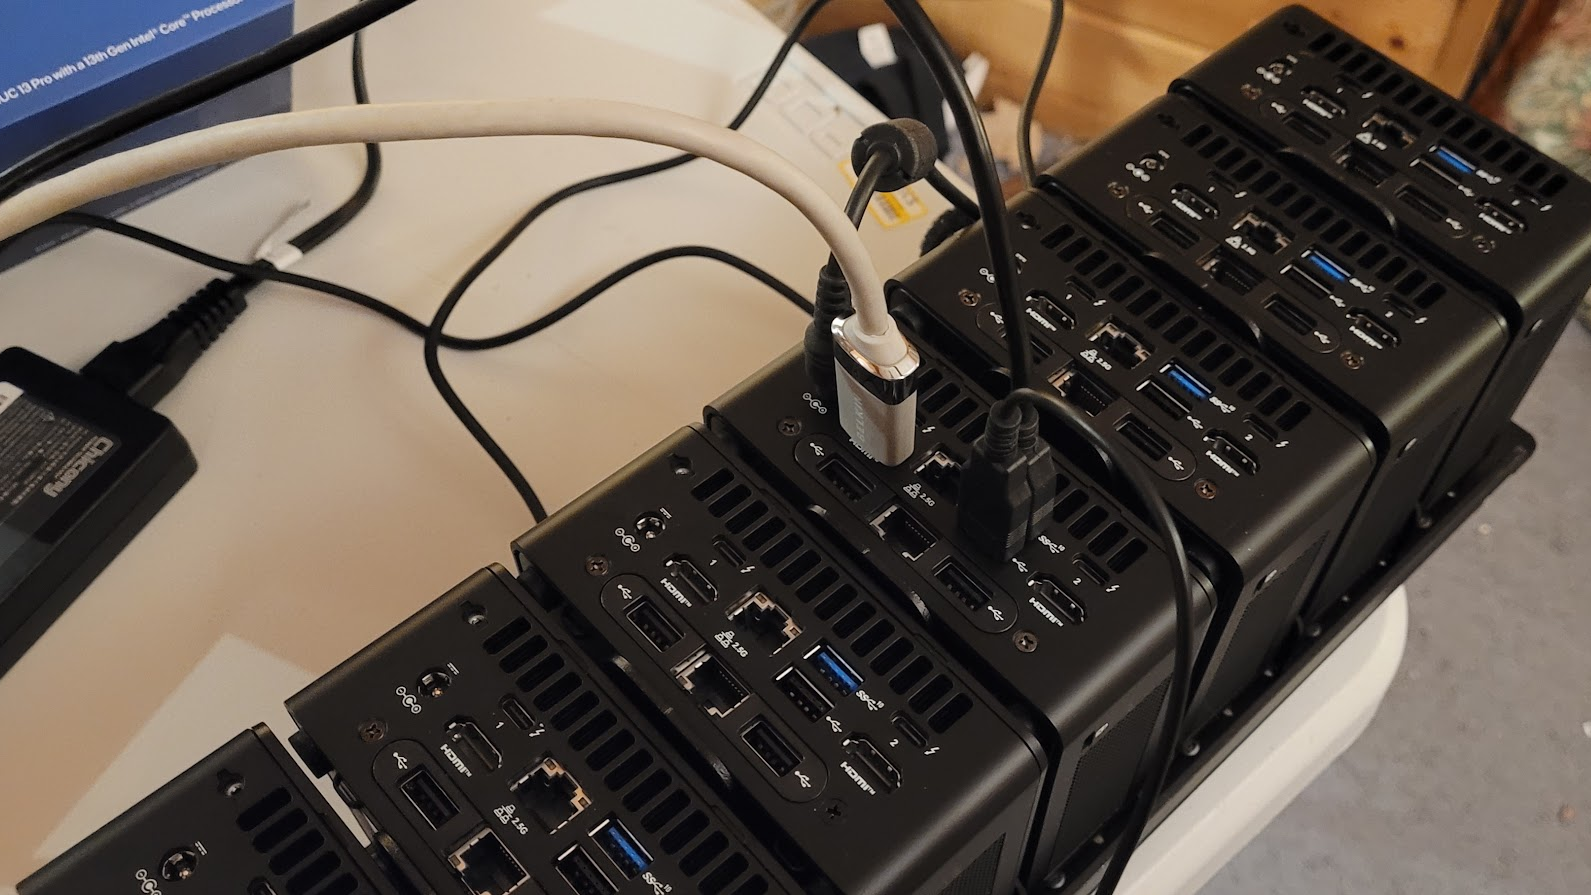
Each individual NUC has fully internal components for reliability’s sake. A particular sticking point was getting a network interface that could live inside of the NUC as opposed to using a USB based Ethernet port as would be common practice with NUCs. I didn’t want any dangling parts with potentially iffy connectors and gravity working against them; and I did want each device to be a self contained unit. Both SSDs are already available as internal components though that was another sticking point for a time.

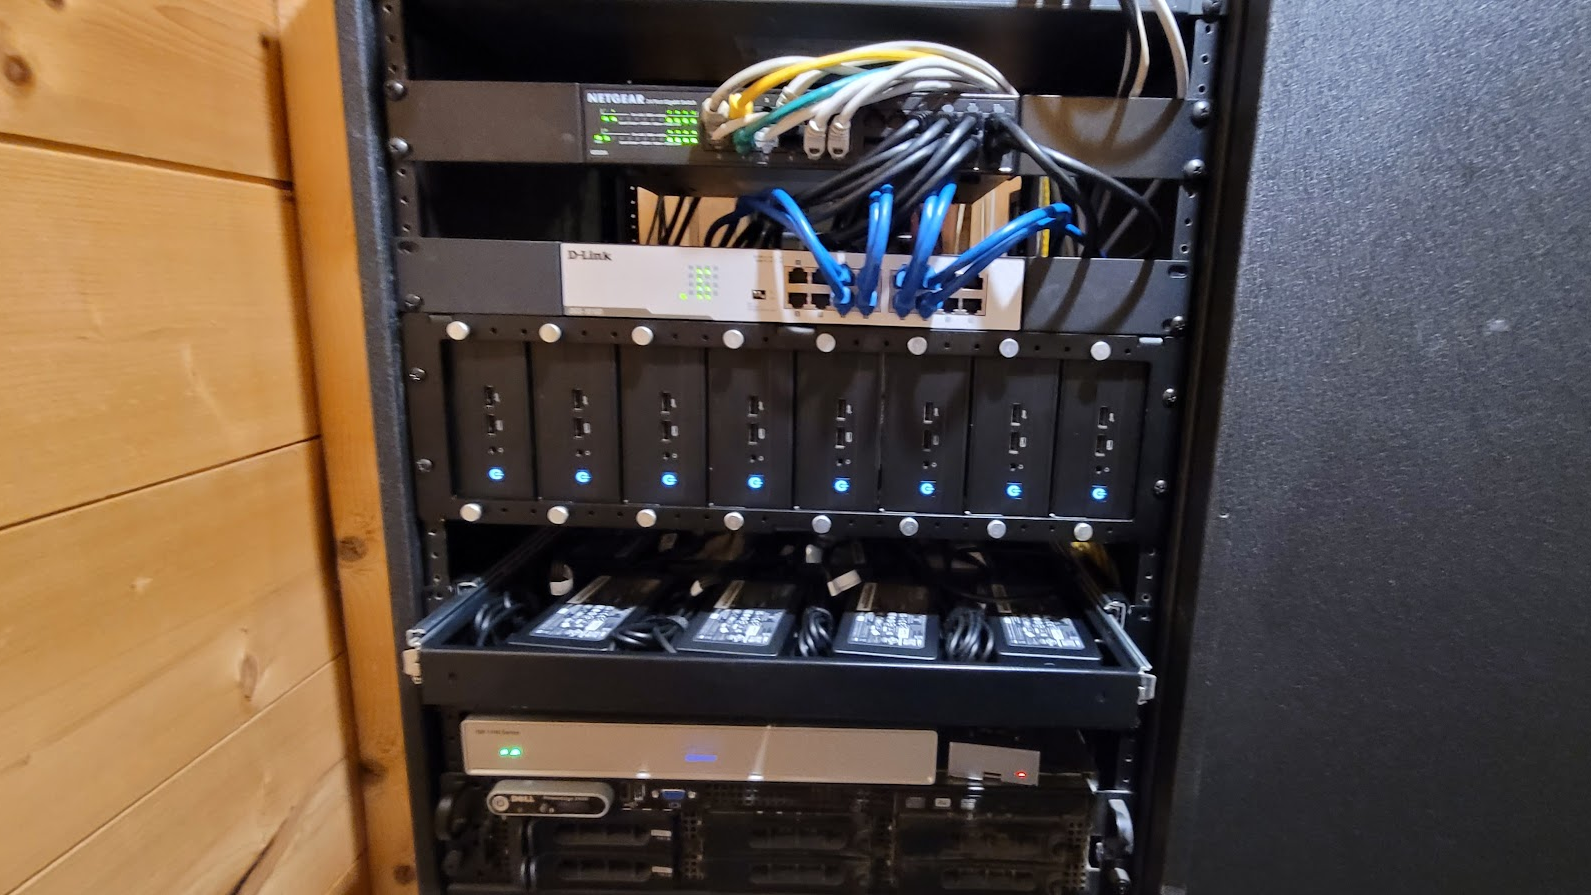
Another requirement was a separate network fabric to allow the CEPH cluster to work unimpeded by other traffic. While the original research with the ACER devices used a single network for all purposes, it is clear that allowing the CEPH cluster to work on it’s own private network fabric provides an important performance boost. This prevents public and private network traffic from workloads from impeding the storage network in any way; and similarly in reverse. Should a node drop out or be added, significant network traffic will be generated by CEPH as it replicates and relocates blocks of data. In the case of workloads that implement distributed database systems, each node will talk to each other over the normal network for distributing query tasks and results without interfering with raw storage tasks. An ordinary (and importantly simple) D-link switch suffices for that local isolated network fabric.
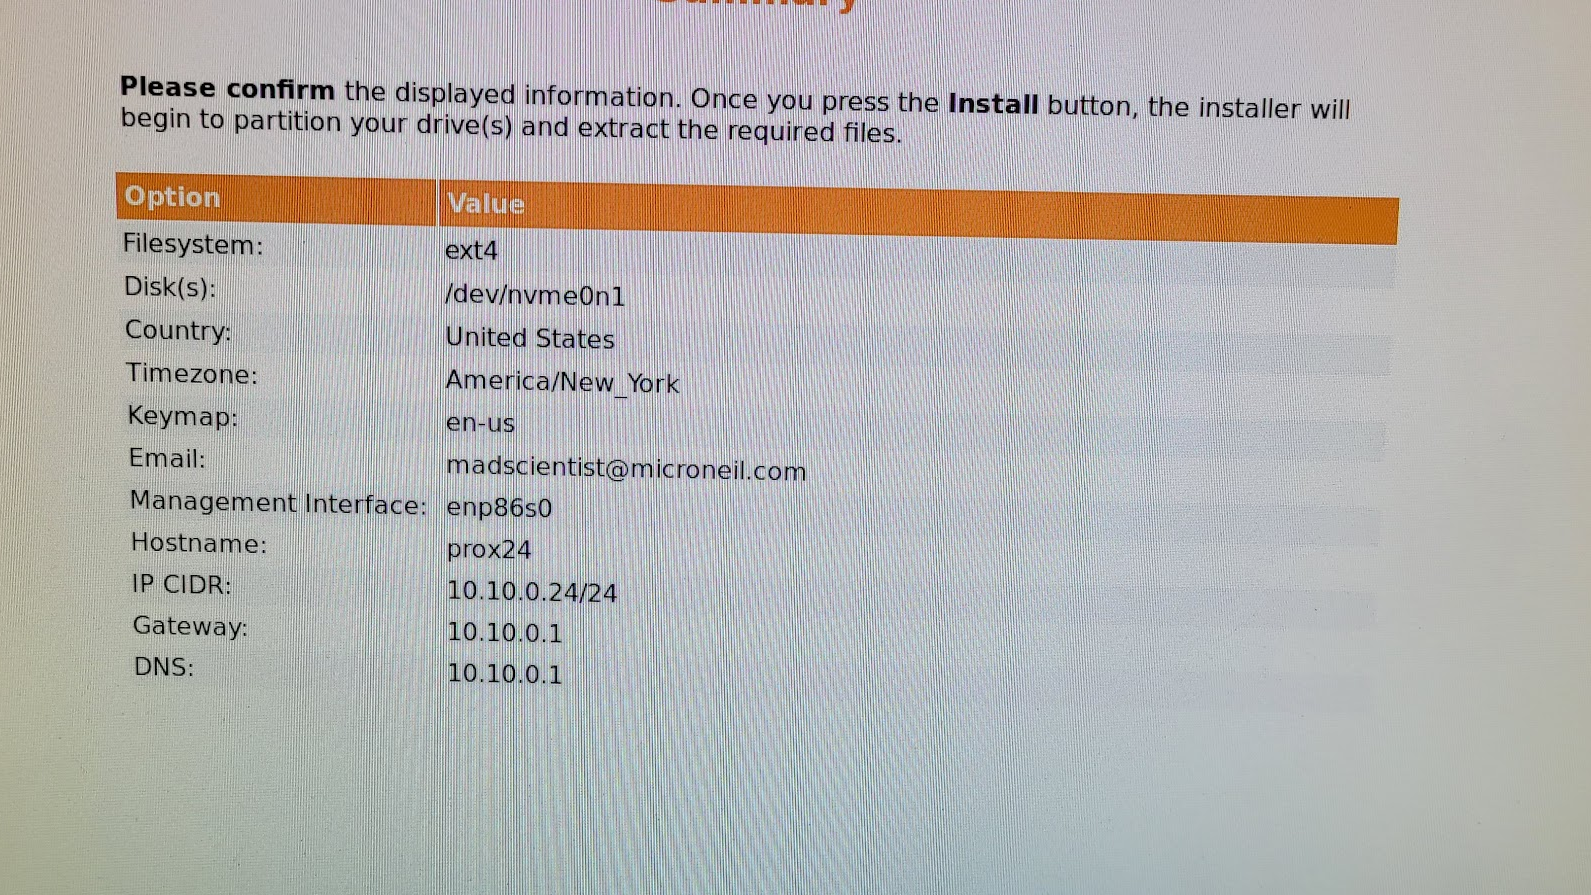
Loading up ProxMox on each node is simple enough. Connect it to a suitable network, monitor, mouse, keyboard, and boot it from an ISO on a USB drive. At first I did all of this from the rear but eventually used one of the convenient front panel USB ports for the ISO image.
Upon booting each device in turn, inspect the hardware configuration to make sure everything is reporting properly, then boot the image and install ProxMox. Each device takes only a few minutes to configure.
Pro tip: Name each device in a way that is related to where it lives on the network. For example, prox24 lives on 10.10.0.24. Mounting the devices in a way that is physically related to their name and network address also helps. Having laid hands on a lot of gear in data centers I’m familiar with how annoying it can be to have to find devices when they could literally be anywhere… don’t do that! As much as possible, make your physical layout coherent with your logical layout. In this case, that first device in the rack is the first device in the cluster (prox24). The one after that will be prox25 and so on…
Installing the cluster in the rack:
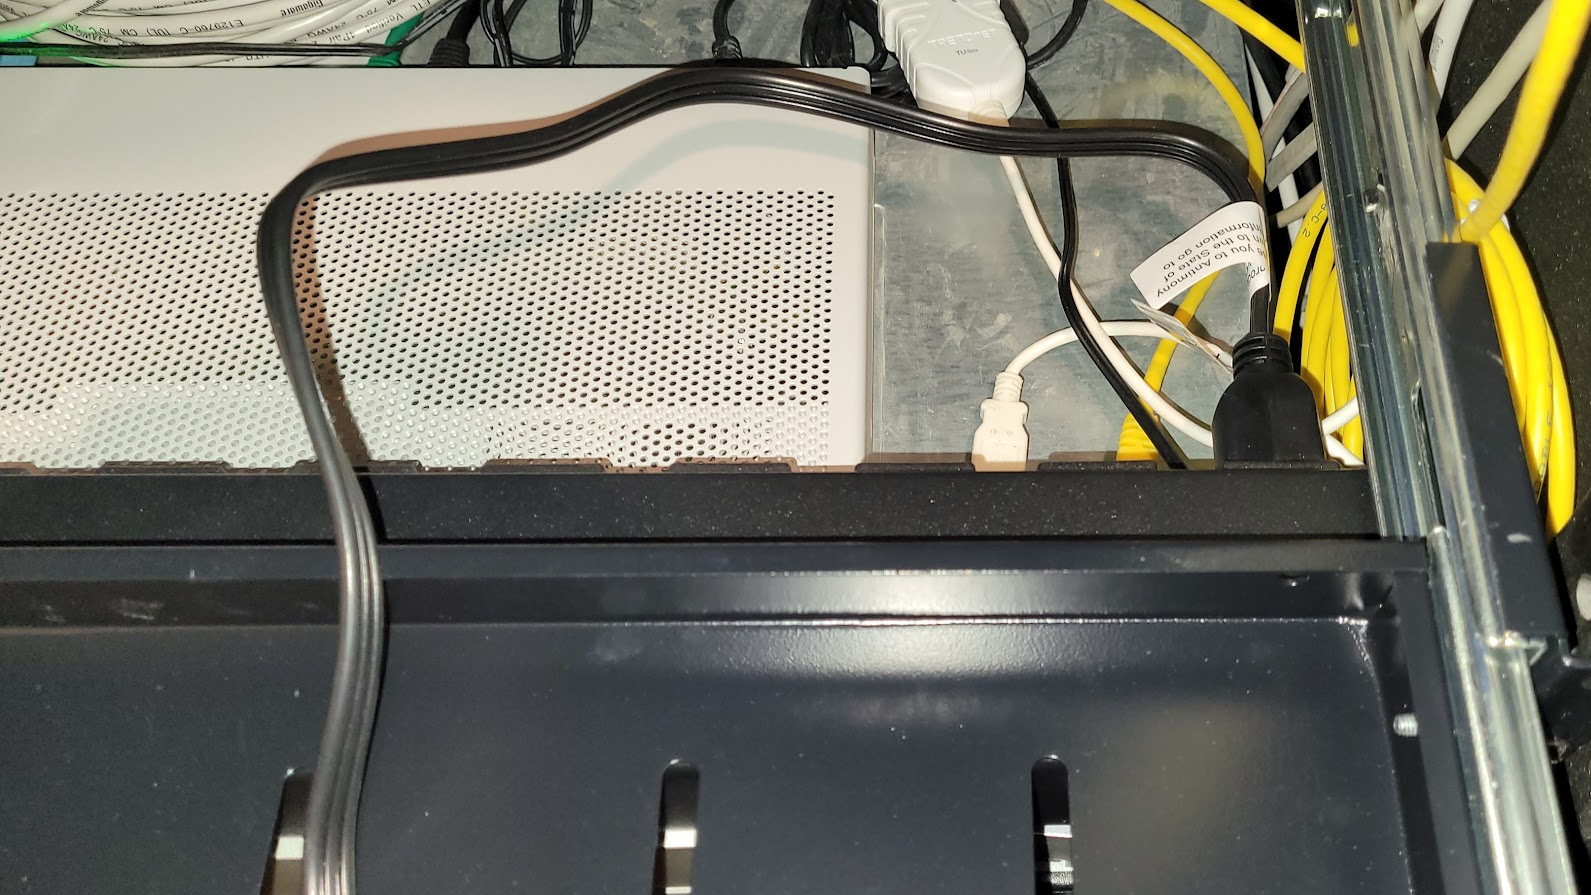
Start by setting up power. The power distribution switch goes in first and then directly above that will go the power supply drawer. I checked carefully to make sure that the mains power cables reach over the edge of the drawer and back to the switch when the drawer is closed. It’s almost never that way in practice, but knowing that it can be was an important step.
Adjust the rails on the drawer to match the rack depth…
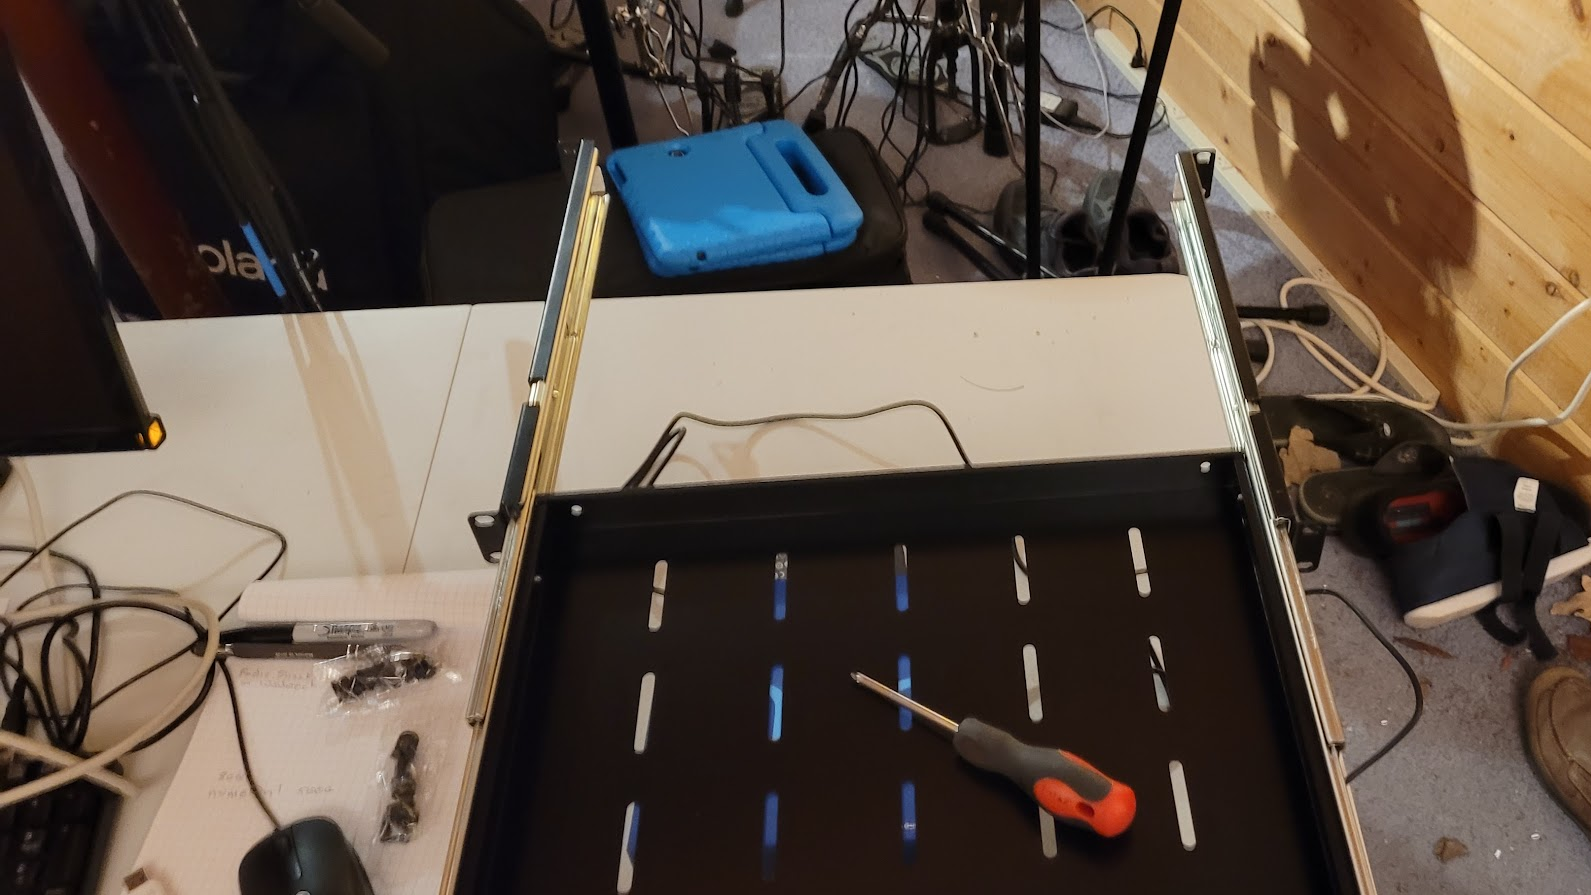
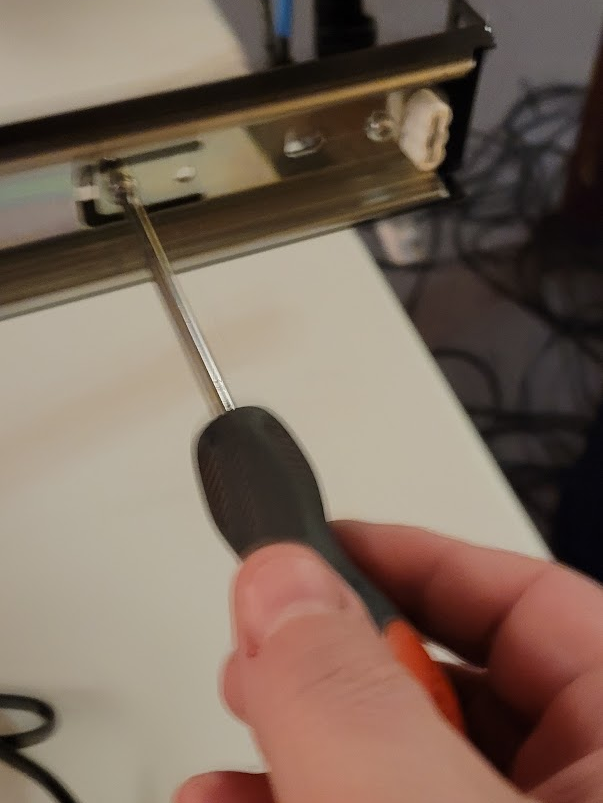
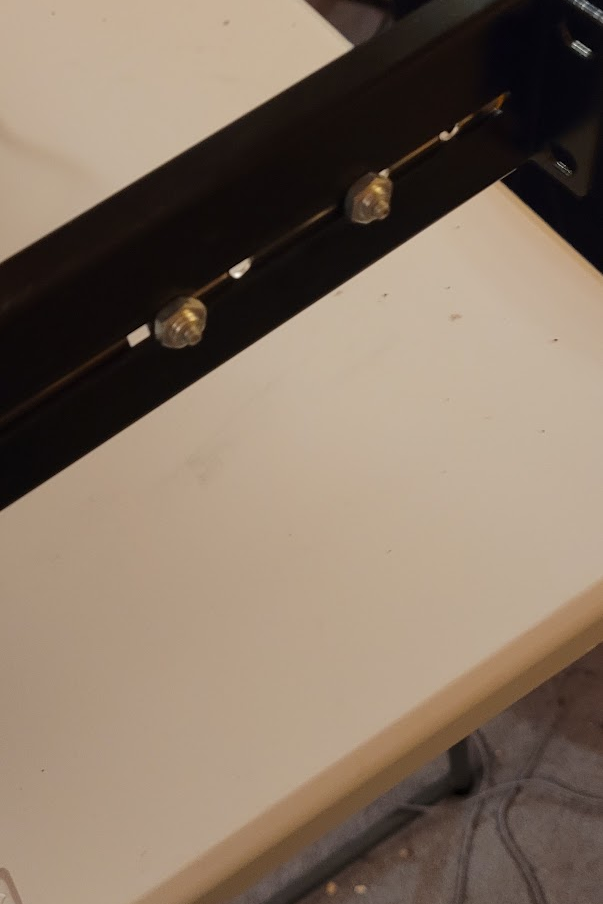
Mount the drawer and drop in a power supply to check cable lengths…
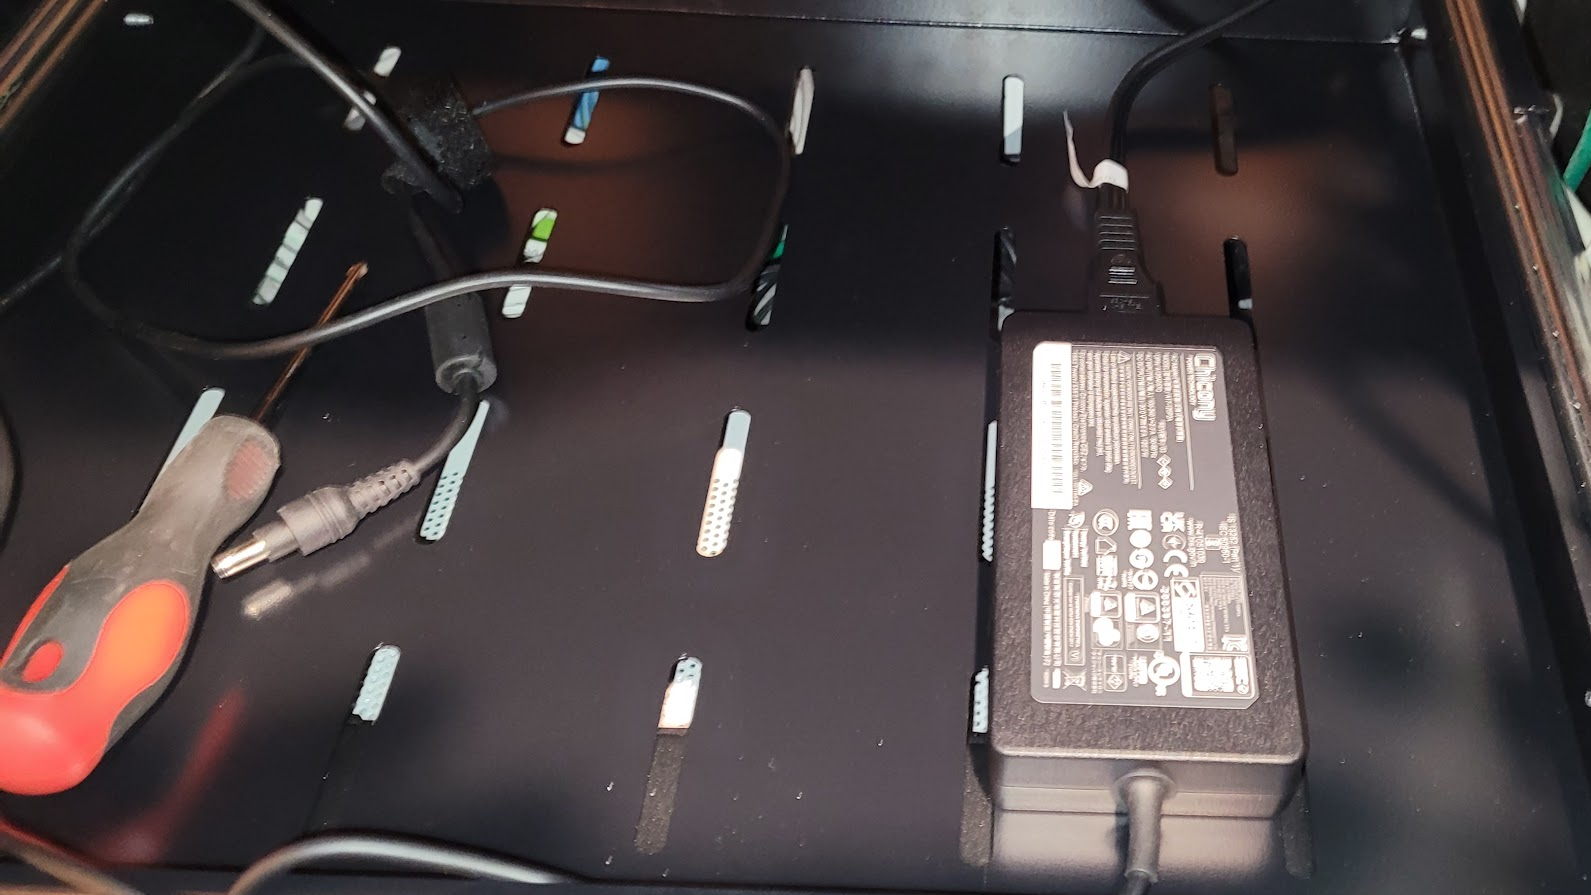
When all power supplies are in the drawer it’s a tight fit that requires them to be staggered. I thought about putting them on their sides in a 2U configuration but this works well enough for now. That might change if I build a power matrix (described briefly above) in which case I’ll probably make 3D printed blocks for each supply to rest in. These would bolt through the holes in the bottom of the drawer and would contain the bridging electronics to make the power redundant and battery capable.

With the power supply components installed the next step was to install the cluster immediately above the power drawer. In order to make the remaining steps easier, I rested the cluster on the edge of the power drawer and connected the various power and network cables before mounting the cluster itself into the rack. This way I could avoid a lot of extra trips reaching through the back of the rack… both annoying and prone to other hazards.
Power first…

Then primary network…
Then the storage network…
With all of the cabling in place then the cluster could be bolted into the rack…
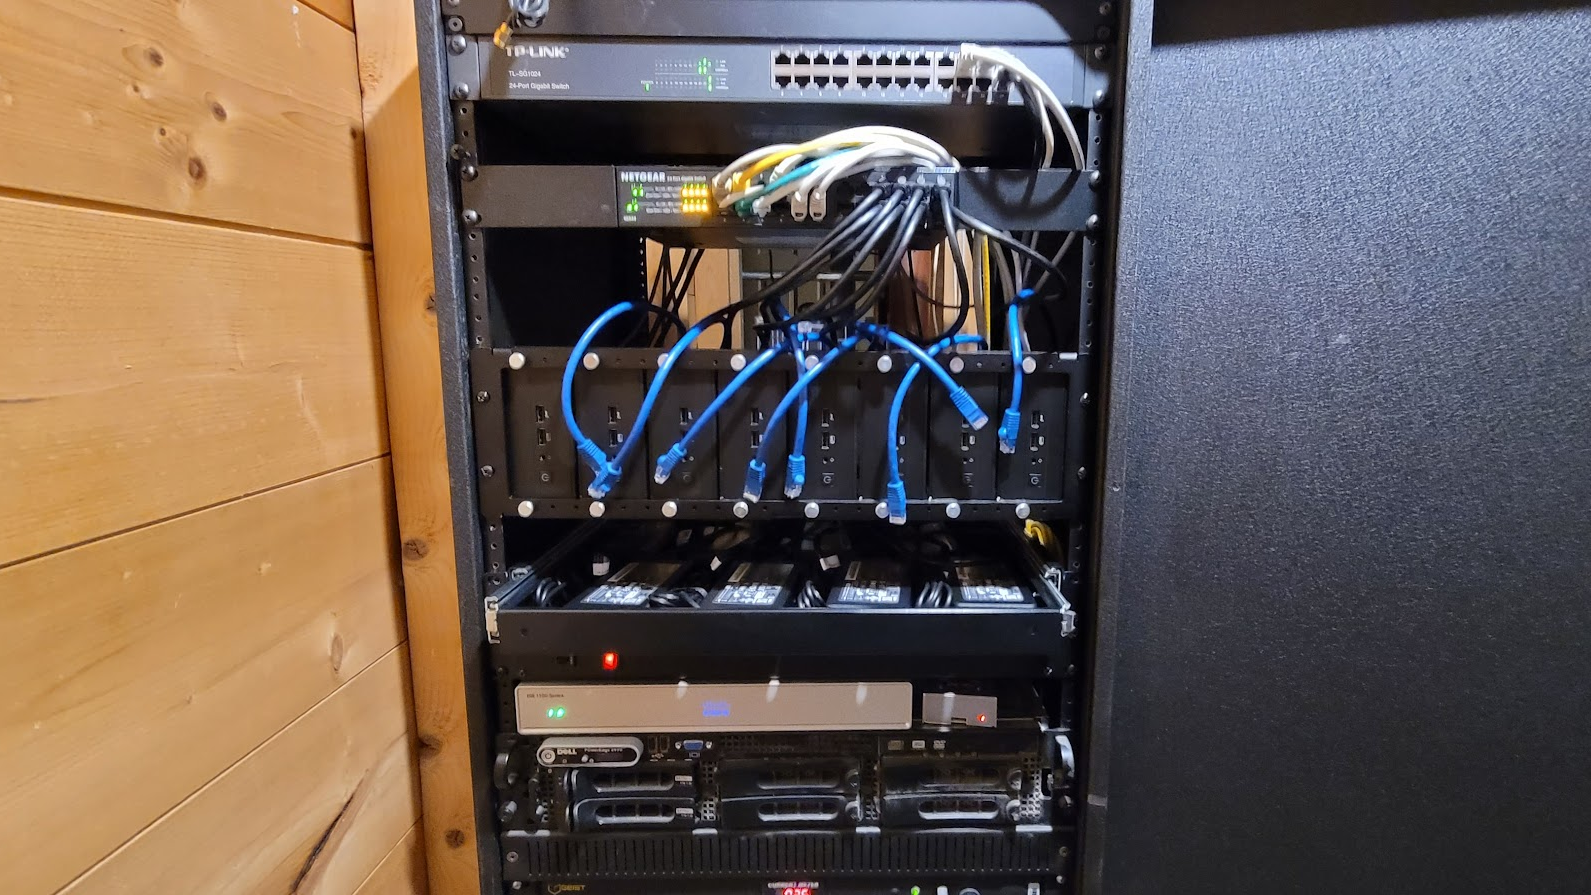
Finally, the storage network switch can be mounted directly above the cluster. Note that the network cables for the cluster are easily available in the gap between the switches. Note also that the switch ports for each node are selected to be consistent between the two switches. This way the cabling and indicators associated with each node in the cluster make sense.
All of the nodes are alive and all of the lights are green… a good start!
The cluster has since taken over all of the tasks previously done by the other servers and the old Synology devices. This includes resilient storage, a collection of network and time services, small scale web hosting, and especially research projects in the lab. Standing up the cluster (joining each node to it) only took a few minutes. Configuring CEPH to use the private network took only a little bit of research and tweaking of configuration files. Getting that right took just a little bit longer as might be expected for the first time through a process like that.
Right now the cluster is busy mining all of the order 32 maximal length taps for some new LFSR based encryption primitives I’m working on… and after a short time I hope to also deploy some SDR tasks to restart my continuous all-band HF WSRP station. (Some antenna work required for that).
Finally: The cluster works as expected and is a very successful project! It’s been up and running for more than a year now having suffered through power and network disruptions of several types without skipping a beat. I look forward to making good use of this cluster, extending it, and building similar clusters for production work loads in other settings. It’s a winning solution worth expanding!